Maya#
This plugin integrates Prism into Autodesk Maya.
Supported Maya versions: 2022+ (Python 3)
Guides#
This section provides an overview of the Prism-Maya integration, including the Basics, Extras and advanced USD workflows.
![[Thumbnail: Maya - Basics]](../../_images/Maya_Basics_thumbnail.jpg)
![[Thumbnail: Maya - Extras]](../../_images/Maya_Extras_thumbnail.jpg)
![[Thumbnail: Maya - USD]](../../_images/Maya_USD_thumbnail.jpg)
Setup#
%USERPROFILE%\Documents\maya\2027
Accessing Prism in Maya#
Prism is available inside Maya from the "Prism" menu in the main menu bar or from the Prism shelf.
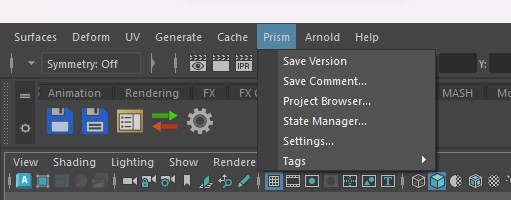
save and version up your scene
save, version up your scene and add a description/thumbnail
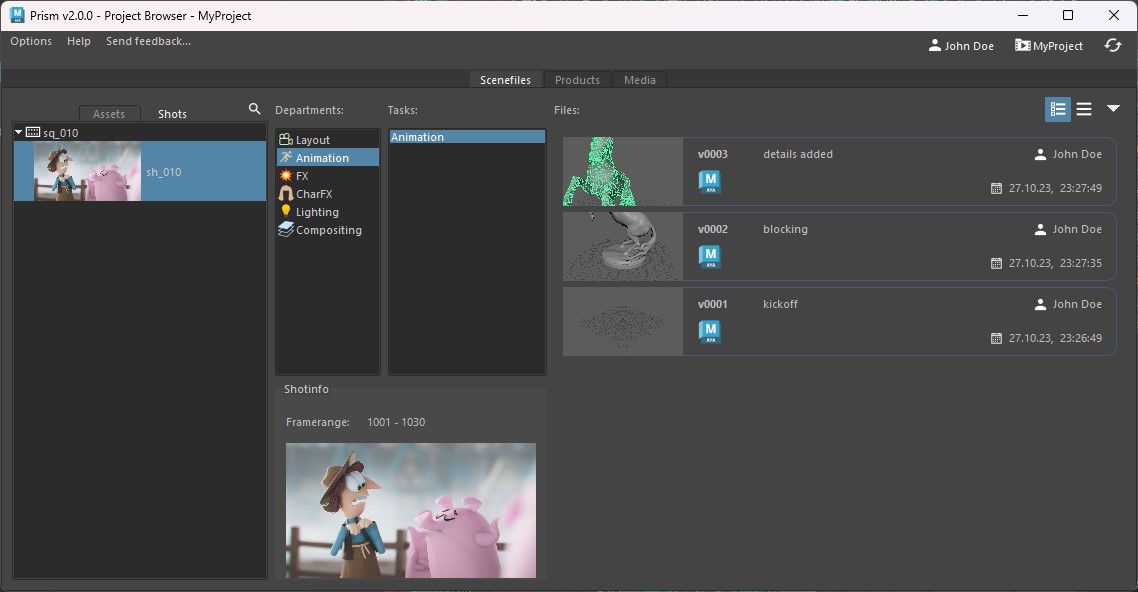
open the Project Browser
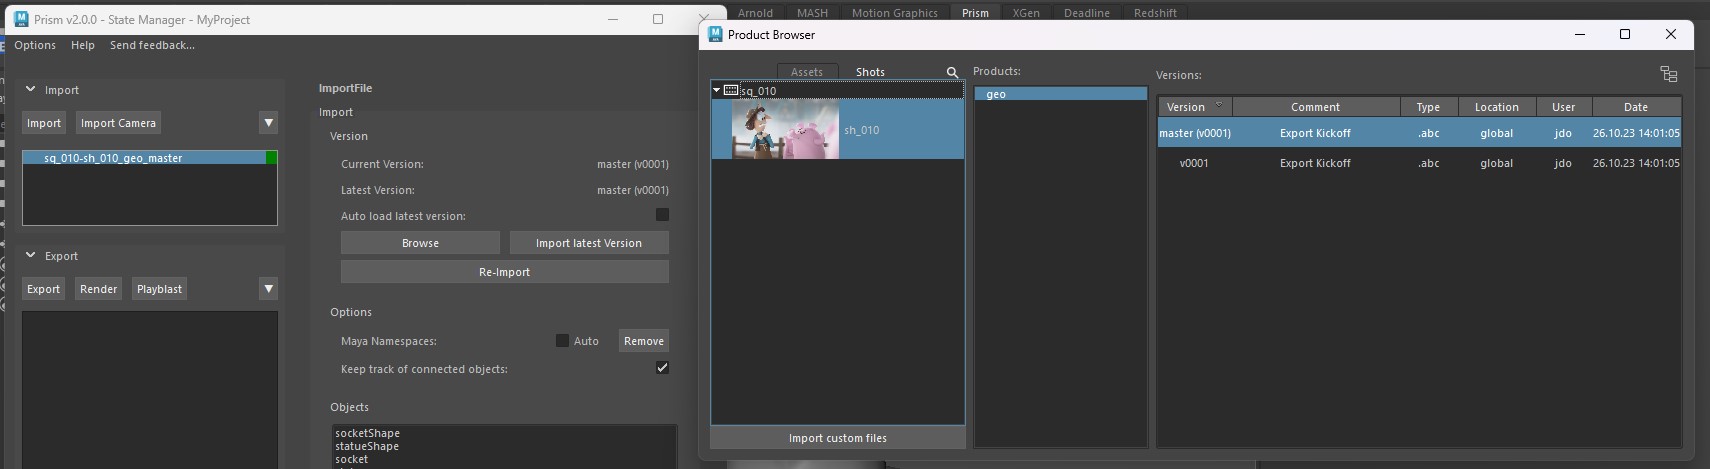
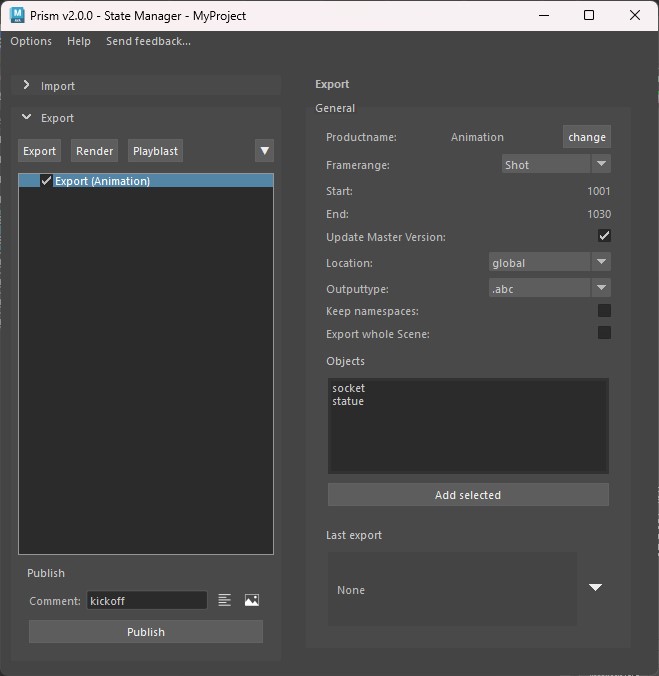
open the State Manager to import, export, playblast and render files
open the Prism Settings
Saving Scenefiles#
You can save new scenefile versions using the options in the Prism menu or by opening the Project Browser and selecting "Create new version from current" in the context menu in the "Scenefiles" tab.
Importing Objects#
Exporting Objects#
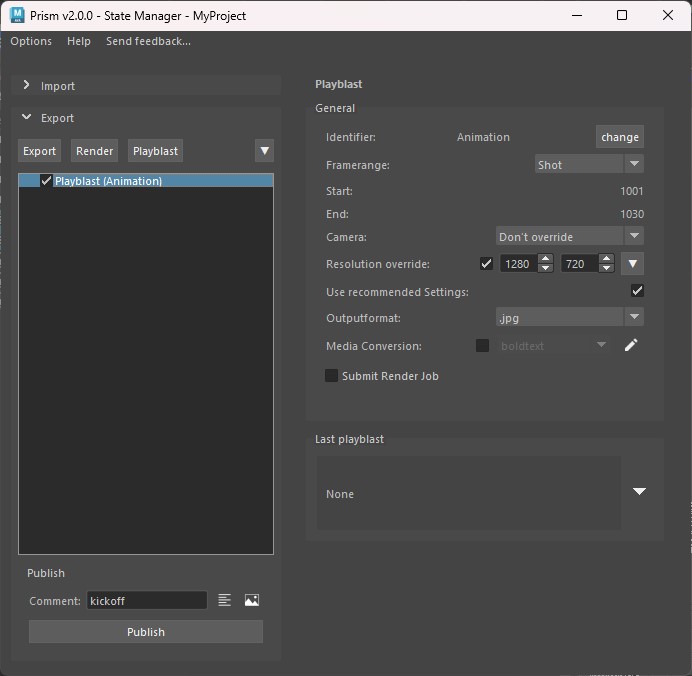
Creating Playblasts#
Rendering#
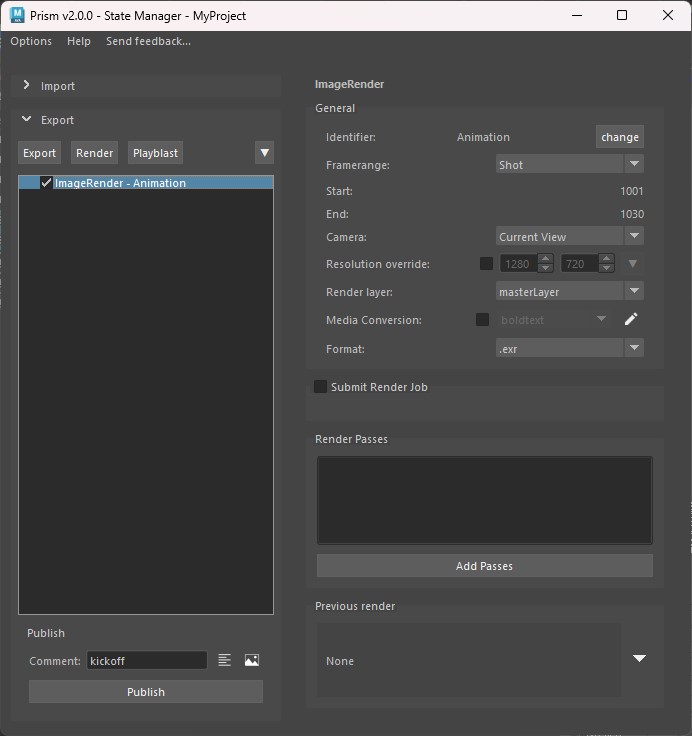
If you have the Deadline plugin installed you will see an option to submit the render as a job to the Deadline render farm.
Scene Building#
Access
Project Browser > Scenefiles tab > Files > Context menu > Build new Scene![[Maya - Scene Building - Access Example]](../../_static/plugins/maya/Maya_SceneBuilding_AccessExample.png)
Hint
Hold "Ctrl" and select "Build new Scene" to trigger a popup with all upcoming steps before execution.
Result
Scene Building Settings
Prism Settings > Project > Scene Building > Maya![[Scene Building - Maya Settings]](../../_static/plugins/maya/Maya_SceneBuilding_Settings.png)
Hint
Additional steps can be added from the dropdown (1) list. Configure the step settings (Edit Settings...) using the "wheel" (2) icon. Enable or disable existing steps via the checkbox (3). Right-click any existing step to access options for removing it ("Remove") or changing its order (Move Up/Move Down).
Maya Steps
Set Shot Framerange: |
|
|---|---|
Description: |
In cases where the defined shot framerange does not align with that of the scene, the scene framerange will be updated.
|
Apply to task: |
Specifies the Entity, Department, or Task for which the step should be executed.
The default selection is
*-*-*, meaning the step applies to all. |
Framerange to apply: |
The framerange can be set based on the
Shotrange or on the Shotrange + Handles.The default selection is
Shotrange. |
Set FPS: |
|
|---|---|
Description: |
If the defined shot FPS differs from FPS of the scene, the scene FPS will be updated.
|
Apply to task: |
Specifies the Entity, Department, or Task for which the step should be executed.
The default selection is
*-*-*, meaning the step applies to all. |
Set Resolution: |
|
|---|---|
Description: |
In case the defined shot resolution does not align with the resolution of the scene, the scene resolution will be synced.
|
Apply to task: |
Specifies the Entity, Department, or Task for which the step should be executed.
The default selection is
*-*-*, meaning the step applies to all. |
Create Model Hierarchy: |
|
|---|---|
Description: |
Creates a default "Model Hierarchy".
|
Apply to task: |
Specifies the Entity, Department, or Task for which the step should be executed.
The default selection is
*-*-*, meaning the step applies to all. |
Import Products: |
|
|---|---|
Description: |
If products with tags are available, they will be imported automatically.
|
Apply to task: |
Specifies the Entity, Department, or Task for which the step should be executed.
The default selection is
*-*-*, meaning the step applies to all. |
Mode: |
Defines if products will be referenced (
Reference) or imported (Import).The default "Mode" is set to
Reference. |
Namespace: |
Custom Maya namespaces can be defined which will be applied during import.
By default it will use the following "Namespace":
{entity}_{task} |
Ignore Master Versions: |
This can be enabled to import the latest product version instead of the master version.
It is disabled by default.
|
Import Shot Cameras: |
|
|---|---|
Description: |
If a shot camera product exists, it will be imported automatically.
|
Apply to task: |
Specifies the Entity, Department, or Task for which the step should be executed.
The default selection is
*-*-*, meaning the step applies to all. |
Run Code: |
|
|---|---|
Description: |
This step allows to run custom Python code.
|
Apply to task: |
Specifies the Entity, Department, or Task for which the step should be executed.
The default selection is
*-*-*, meaning the step applies to all. |
Code: |
The code field accepts custom Python code for execution.
|
Apply Alembic Caches: |
|
|---|---|
Description: |
This step checks for available animation caches.
For each found cache the corresponding Surfacing product which is tagged with
static will be imported.Subsequently, the animation caches will be applied to each referenced Surfacing product.
|
Apply to task: |
Specifies the Entity, Department, or Task for which the step should be executed.
The default selection is
*-*-*, meaning the step applies to all. |
Further Reading
Alongside the Maya specific information, additional details on Scene Building can be found on the Scene Building page.Alembic Workflow#
Adding Prism integration using environment variables#
It is possible to use environment variables to add the Prism integration to Maya instead of adding the Prism integration into the Maya User Preferences.
The following environment variables need to be defined:
PRISM_ROOT = C:\Program Files\Prism2
PYTHONPATH = C:\ProgramData\Prism2\plugins\Maya\Integration\scripts
MAYA_SHELF_PATH = C:\ProgramData\Prism2\plugins\Maya\Integration\shelves
XBMLANGPATH = C:\ProgramData\Prism2\plugins\Maya\Integration\icons
These environment variables can be set in the system settings or in the Maya.env file.
To load the Prism Maya plugin from a central location in your studio you can set the MAYA_ENV_DIR environment variable and point it to a folder on your network storage. In that folder create a Maya.env file with the following content:
PRISM_ROOT = C:\Program Files\Prism2
PYTHONPATH = C:\ProgramData\Prism2\plugins\Maya\Integration\scripts
MAYA_SHELF_PATH = C:\ProgramData\Prism2\plugins\Maya\Integration\shelves
XBMLANGPATH = C:\ProgramData\Prism2\plugins\Maya\Integration\icons
Troubleshooting#
I don't see the Prism shelf in Maya#
I see the Prism shelf, but get a warning when I try to open the Project Browser#
%USERPROFILE%\Documents\maya\2024\scripts\userSetup.py