

OpenTimelineIO Integration#
2026-06-13
8 min read

Overview#
OpenTimelineIO (OTIO) is an open-source interchange format and API for editorial timeline information, developed under the Academy Software Foundation (ASWF). It provides a vendor-neutral way to represent and exchange timeline data - shots, clips, frame ranges, media references, and metadata - across different tools in a visual effects and animation pipeline.
Integrating OTIO into a studio workflow brings several advantages:
Interoperability - timelines authored in one application can be read by any other tool that supports OTIO, without manual re-entry.
Version-controlled editorial data - by saving OTIO files as Prism product versions, editorial timelines become part of the same versioning and review system as renders and exports.
Pipeline automation - the Execution Graph can assemble and save OTIO timelines programmatically as part of a larger automated workflow.
Shot validation - downstream departments can import timeline data to verify frame ranges, shot order, and media references without needing access to the originating application.
Creating OTIO Files from the Project Browser#
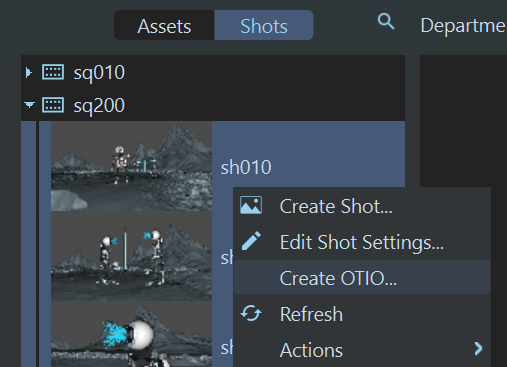
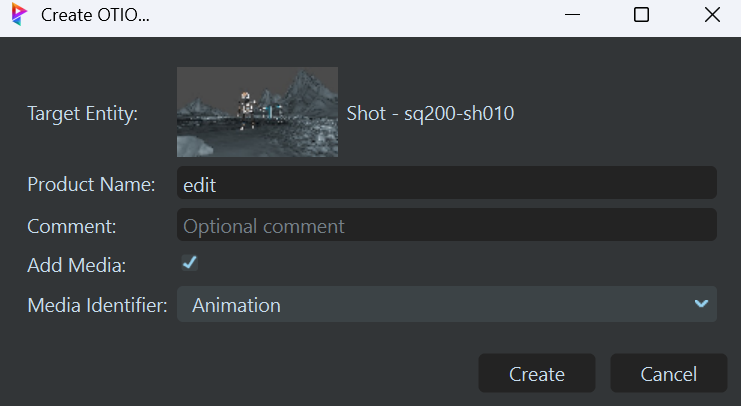
Setting |
Description |
|---|---|
Target Entity |
Click the entity area to open the entity selector and choose the asset, shot, sequence, or episode under which the OTIO file will be saved as a product. The entity thumbnail and name are shown once selected. |
Product Name |
The name of the product version that will be created (e.g. |
Comment |
An optional comment attached to the product version. |
Add Media |
When checked, the timeline clips will be linked to actual media files from the project. A Media Identifier dropdown appears when this option is enabled. |
Media Identifier |
(visible when Add Media is checked) Select which media identifier to use as the clip source for each shot. The dropdown is populated from all media identifiers found across the selected shots. |
Location |
The storage location where the product version will be saved. Only shown when more than one storage location is configured in the project. |
Note
The frame rate of the generated timeline is taken from the project's FPS setting.
Open RV#
.otio files from the Project Browser.Exporting the Timeline to OTIO#
To Sequence: <name> - saves the timeline directly as a versioned product under the sequence that the first item belongs to, using an automatically generated path.
Custom... - opens a save-file dialog so you can choose any destination path and filename.
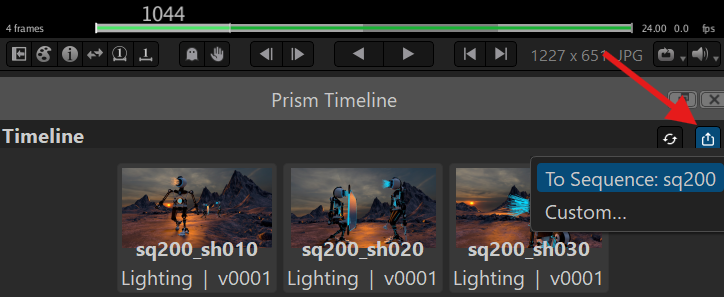
Importing an OTIO File into RV#
.otio product version and select Import. The timeline data is read and applied inside RV.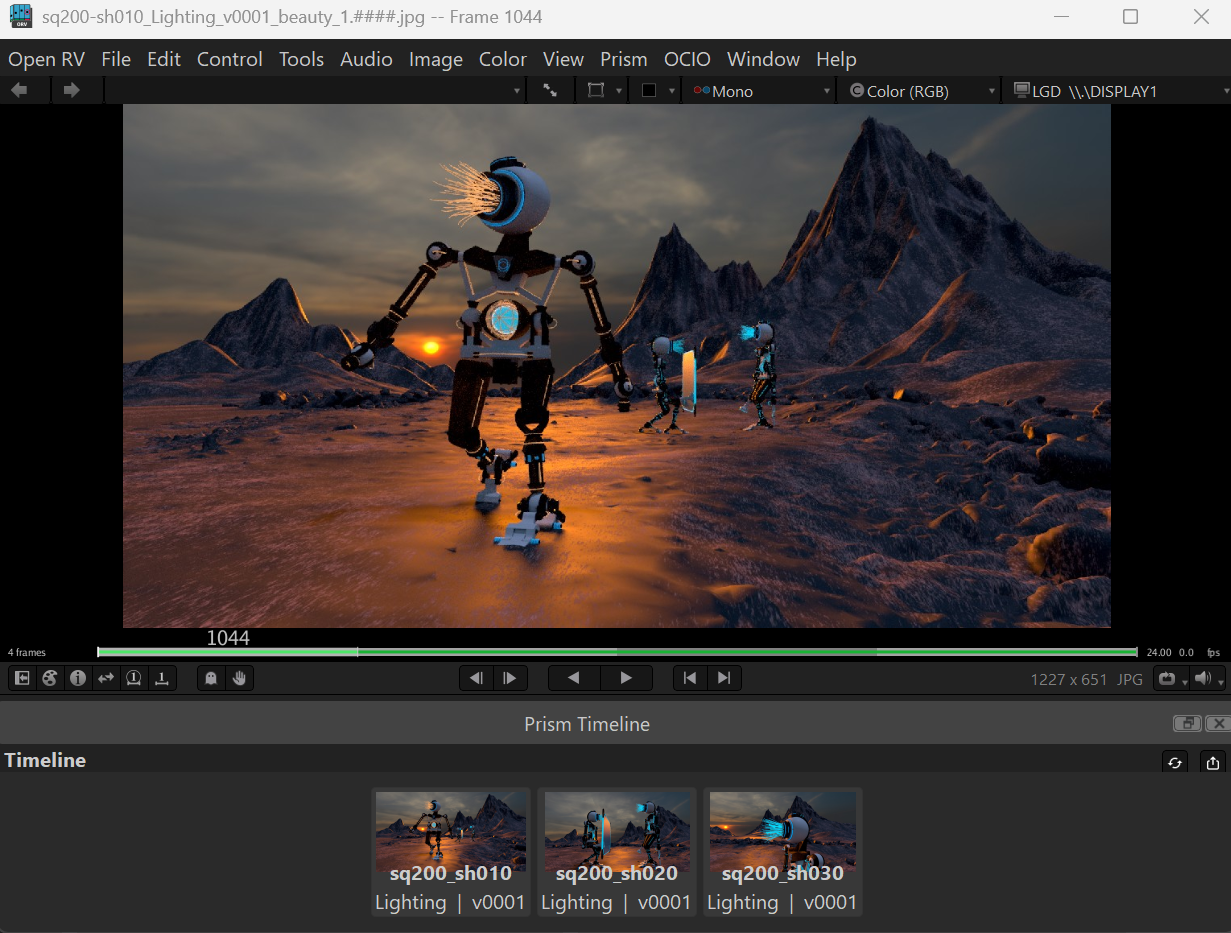
DaVinci Resolve#
Exporting the Timeline to OTIO#
.otio product in the project.Importing an OTIO File into Resolve#
.otio product version and select Import.Note
The department and task used in the output product path when exporting can be controlled with the PRISM_RESOLVE_DEPARTMENT and PRISM_RESOLVE_TASK environment variables. These are described in detail on the Resolve plugin page.
Maya#
.otio files through the Maya Camera Sequencer.Note
OTIO support in Maya requires Maya 2027.1 or later.
Exporting the Sequencer to OTIO#
.otio as the output format. When the state is executed, the contents of the Maya Camera Sequencer - including camera assignments, shot metadata, audio, and file references - are exported and saved as a versioned product in the Prism project.Importing an OTIO File into the Sequencer#
.otio product version.Blender#
.otio to publish the entire workspace sequencer timeline as a versioned product. No objects need to be selected; the state frame range does not trim the export. Additional Settings... > Resolve Metadata enables Resolve-specific metadata and is off by default..otio product through the Project Browser or an Import state. Blender uses an empty sequencer scene or creates a new scene when the target is occupied. Prism activates the destination scene, whose FPS and frame range come from the imported timeline.Houdini#
.otio files through the State Manager, using Houdini's native timeline bookmarks as the data source.Exporting Bookmarks to OTIO#
.otio. No node connection is required - the export reads the current timeline bookmarks directly from Houdini..otio product in the Prism project.Importing an OTIO File as Bookmarks#
.otio product version.Execution Graph#
Create Timeline#
Creates a new, empty OTIO timeline object.
Settings:
Name - The name of the timeline (e.g.
Main Timeline).
Outputs:
Timeline - The newly created OTIO timeline, which can be passed to Create Track or Save Timeline nodes.
Create Track#
Adds a new track to an existing timeline.
Inputs:
Timeline - The timeline to add the track to.
Outputs:
Timeline - The updated timeline.
Track - The newly created track, which can be passed to Create Clip nodes.
Create Clip#
Creates a new clip and appends it to a track.
Inputs:
Timeline - The timeline the track belongs to.
Track - The track to append the clip to.
Settings:
Source - The file path of the media to reference in the clip.
Outputs:
Timeline - The updated timeline.
Track - The track with the new clip appended.
Clip - The newly created clip.
Save Timeline#
Saves a completed OTIO timeline to disk.
Inputs:
Timeline - The timeline to save.
Settings:
Timeline - The destination file path for the
.otiofile (set as a parameter rather than a port connection).
Outputs:
Result - A value indicating whether the save was successful.

Future Support#
Frequently Asked Questions#
Do I need to install any additional software to use OTIO?
No. The opentimelineio Python package is bundled with Prism and requires no separate installation.
Can I create an OTIO timeline without linking it to media files?
Yes. In the Create OTIO dialog, leave the Add Media option unchecked. The resulting timeline will contain shot names, frame ranges, and the project FPS, but no media file references.
Where is the generated OTIO file stored?
The file is saved as a versioned product inside the Prism project, under the entity and product name you specified in the dialog. You can find it in the Products tab of the Project Browser.
Which DCC applications currently support OTIO?
The following integrations are currently available:
Project Browser - create OTIO files from any platform
Open RV - export the timeline via the Prism Timeline panel and import
.otiofiles via the Project BrowserDaVinci Resolve - export the timeline to OTIO and import OTIO files
Maya 2027.1 or later - export and import via the Camera Sequencer
Blender 5.3 or later - export and import Video Sequencer timelines
Houdini - export timeline bookmarks to OTIO and import
.otiofiles as bookmarksExecution Graph - build and save OTIO timelines programmatically
Support for additional applications will be added as they introduce native OTIO capabilities.
In which Prism version was OTIO support added?
OTIO support was introduced in Prism 2.1.3.