Using Prism in your DCCs#
Introduction#
In this guide we'll take a look at using Prism in DCCs like Houdini, Maya, 3ds Max or Blender.
The following steps assume that you followed the Getting Started guide, where you install plugins, create a project and create some shots.
Opening your DCCs#
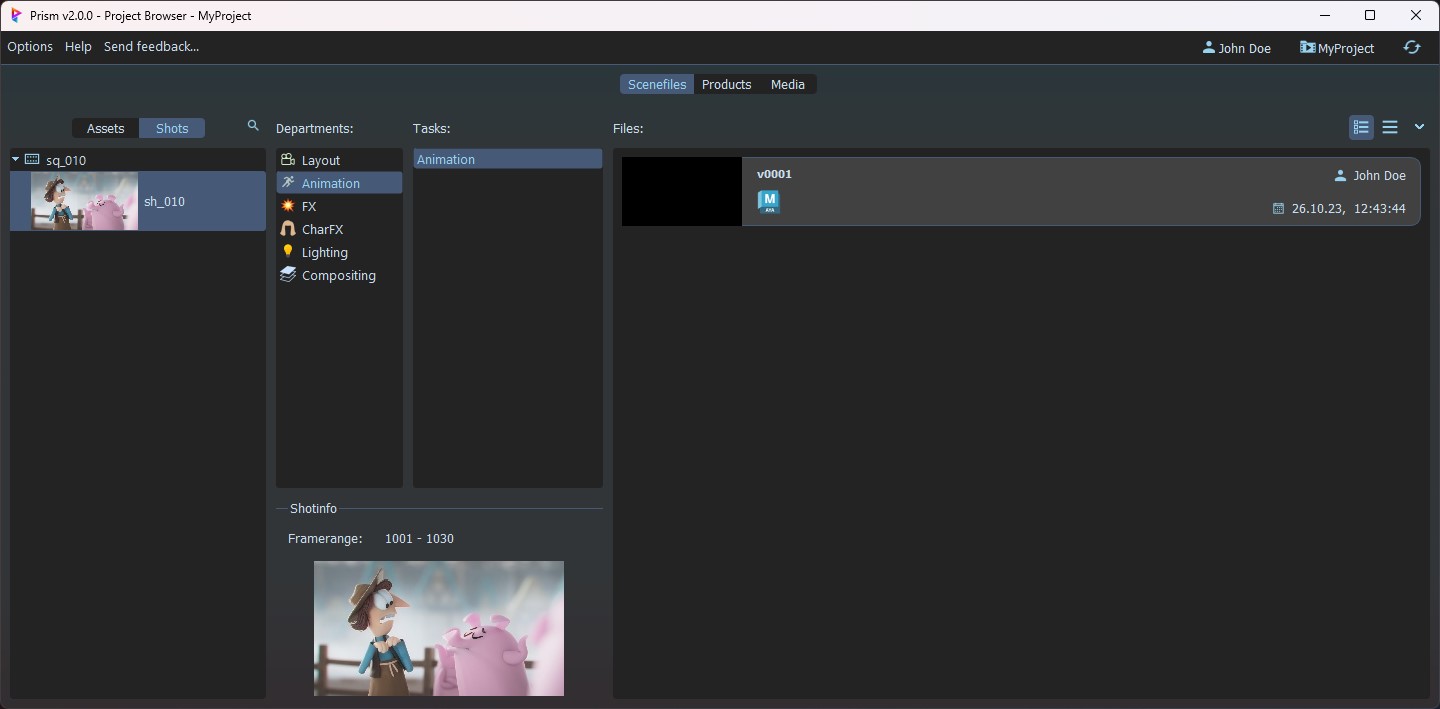
You can open your DCCs by double clicking a scenefile in your Prism standalone Project Browser.
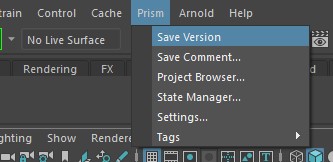
Saving a scenefile#
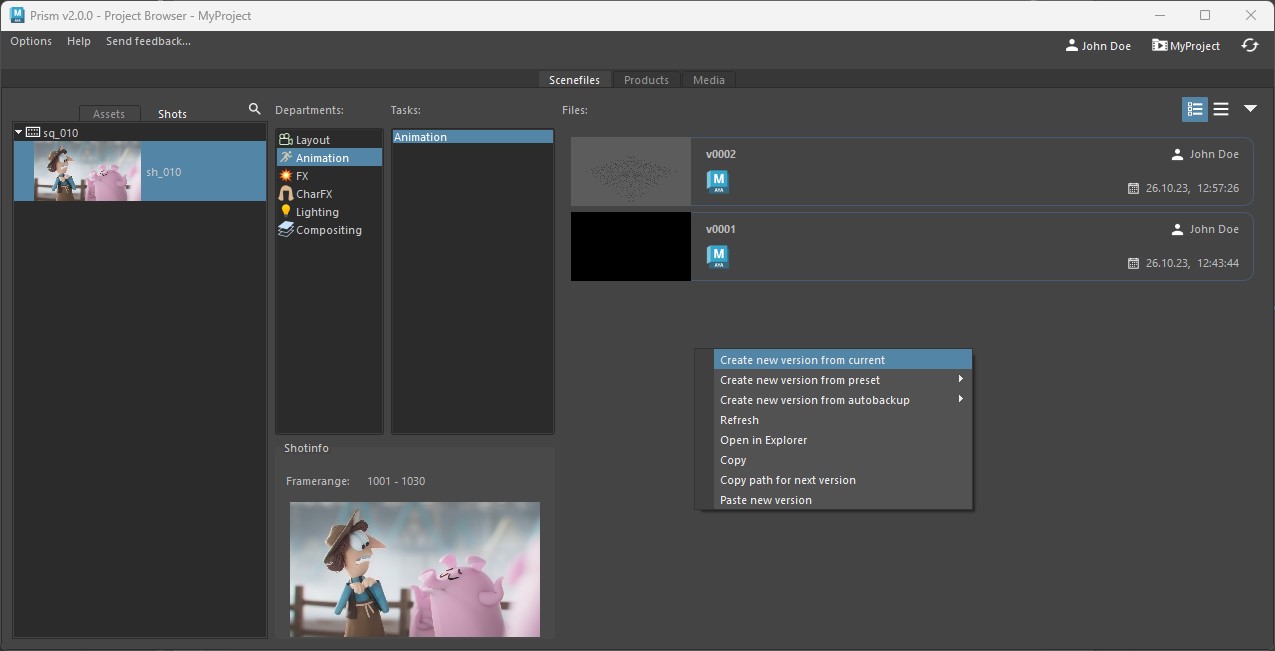
To save your currently open scene into a specific task, navigate to the task in the Project Browser and select "Create new version from current" from the context menu.
Versioning and opening scenefiles#
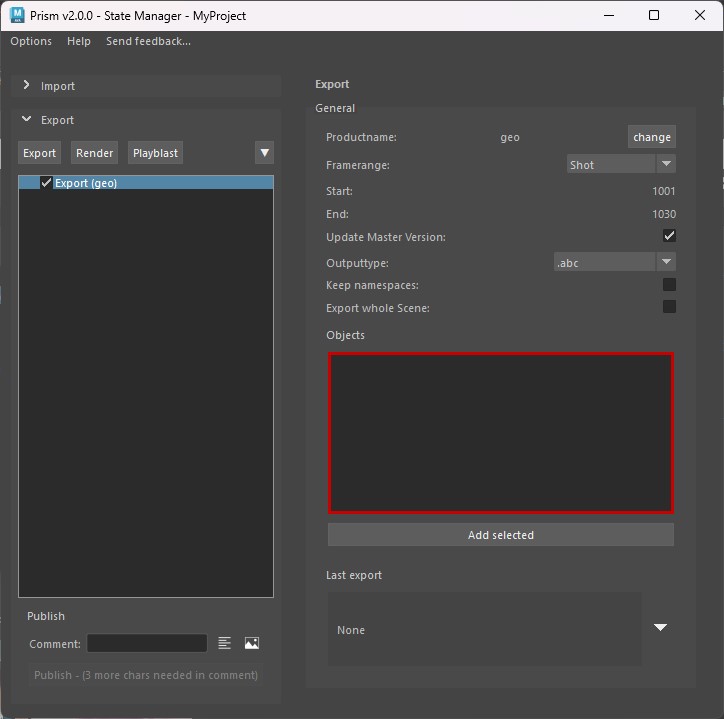
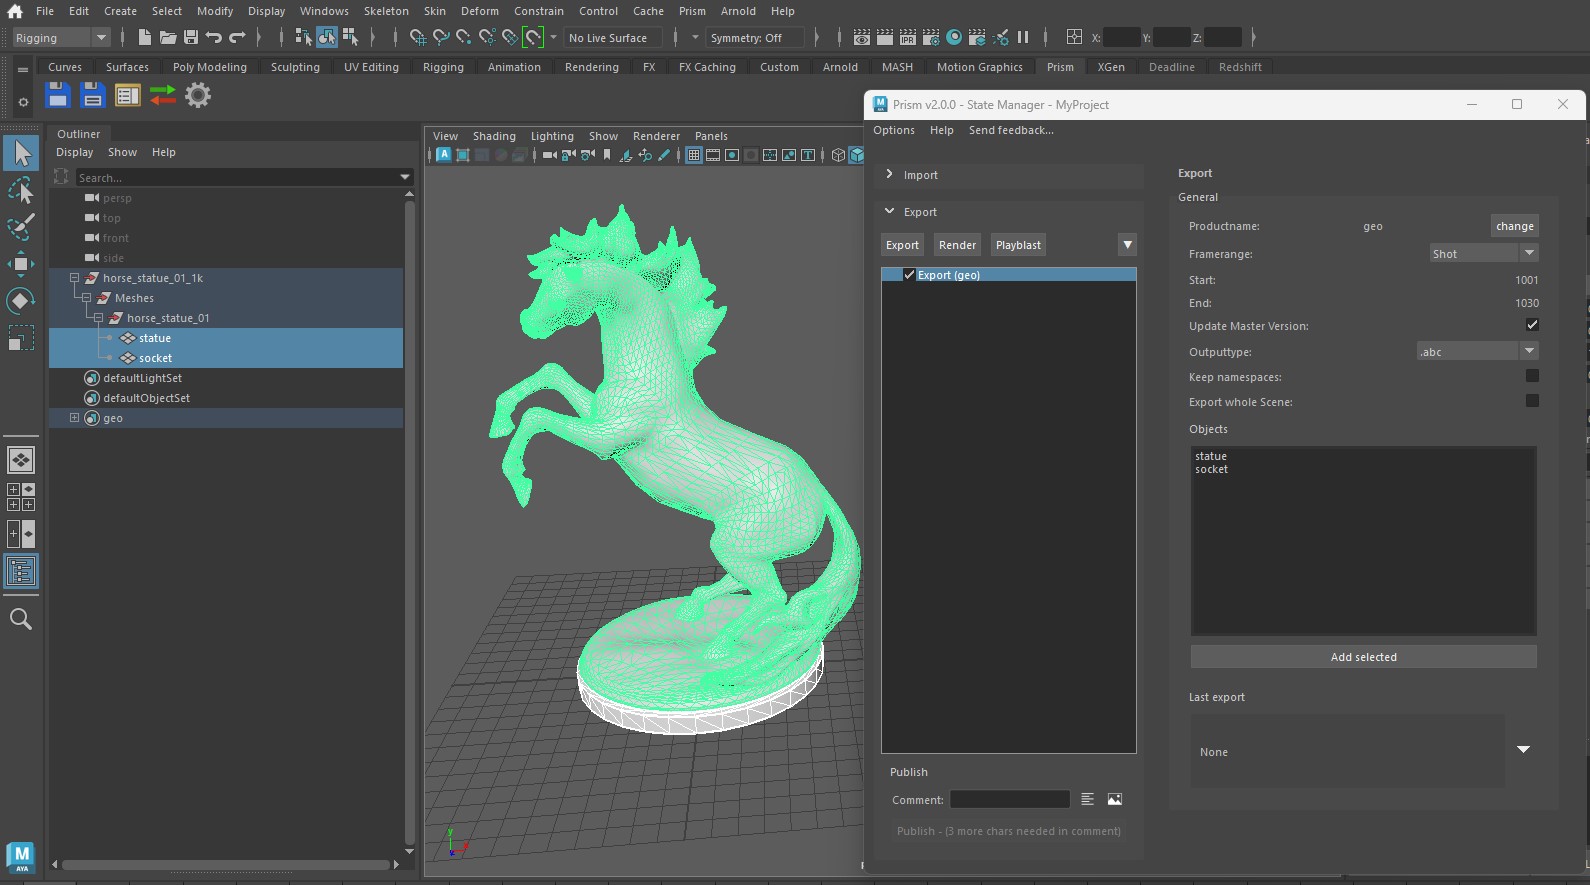
Exporting objects#
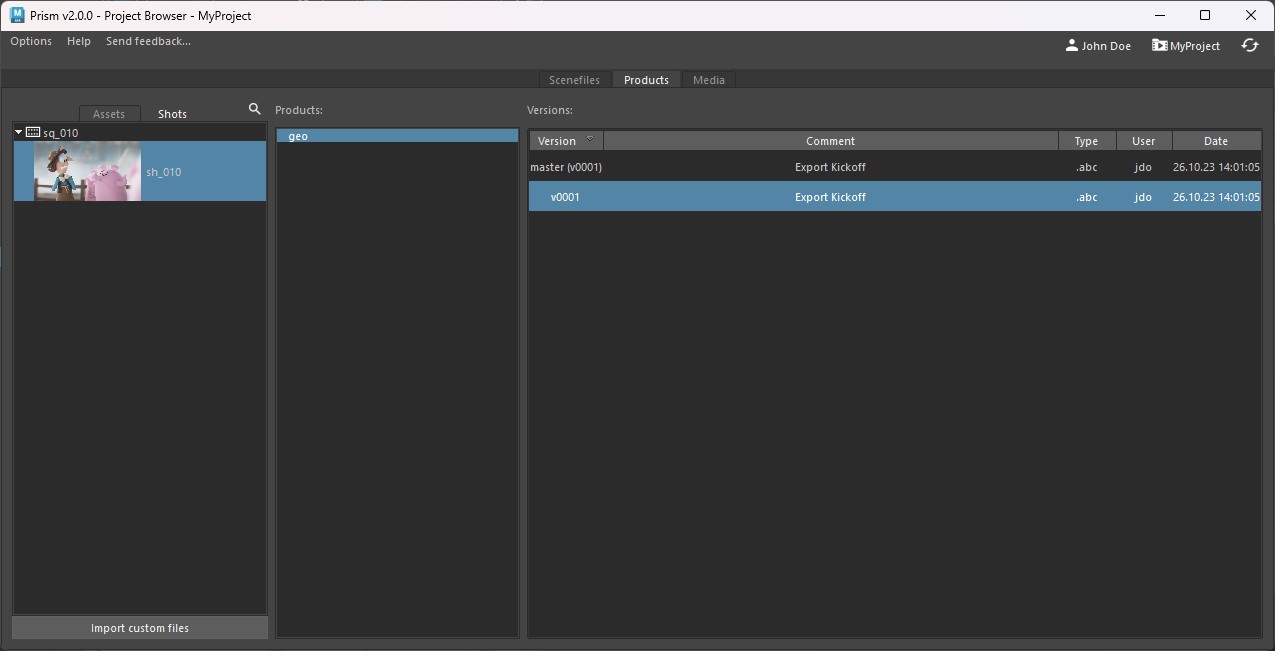
You can see all your exported files in the "Products" tab of the Project Browser
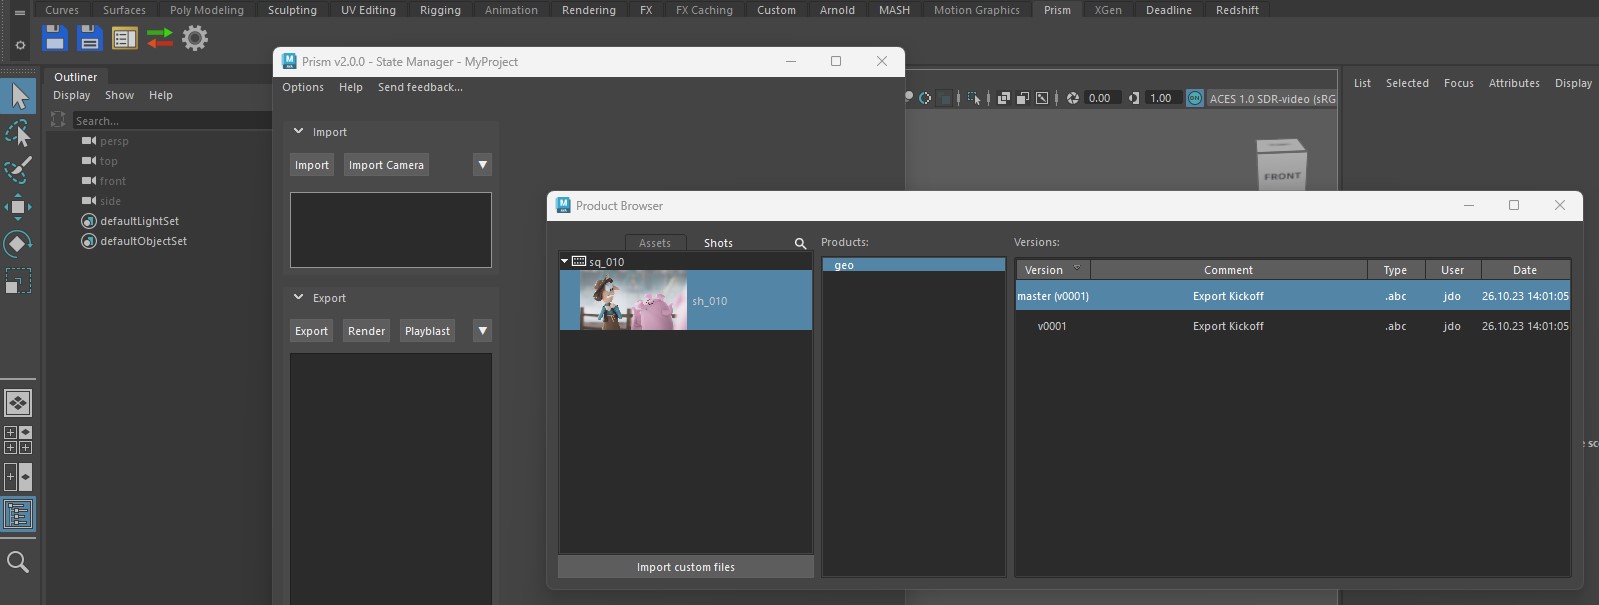
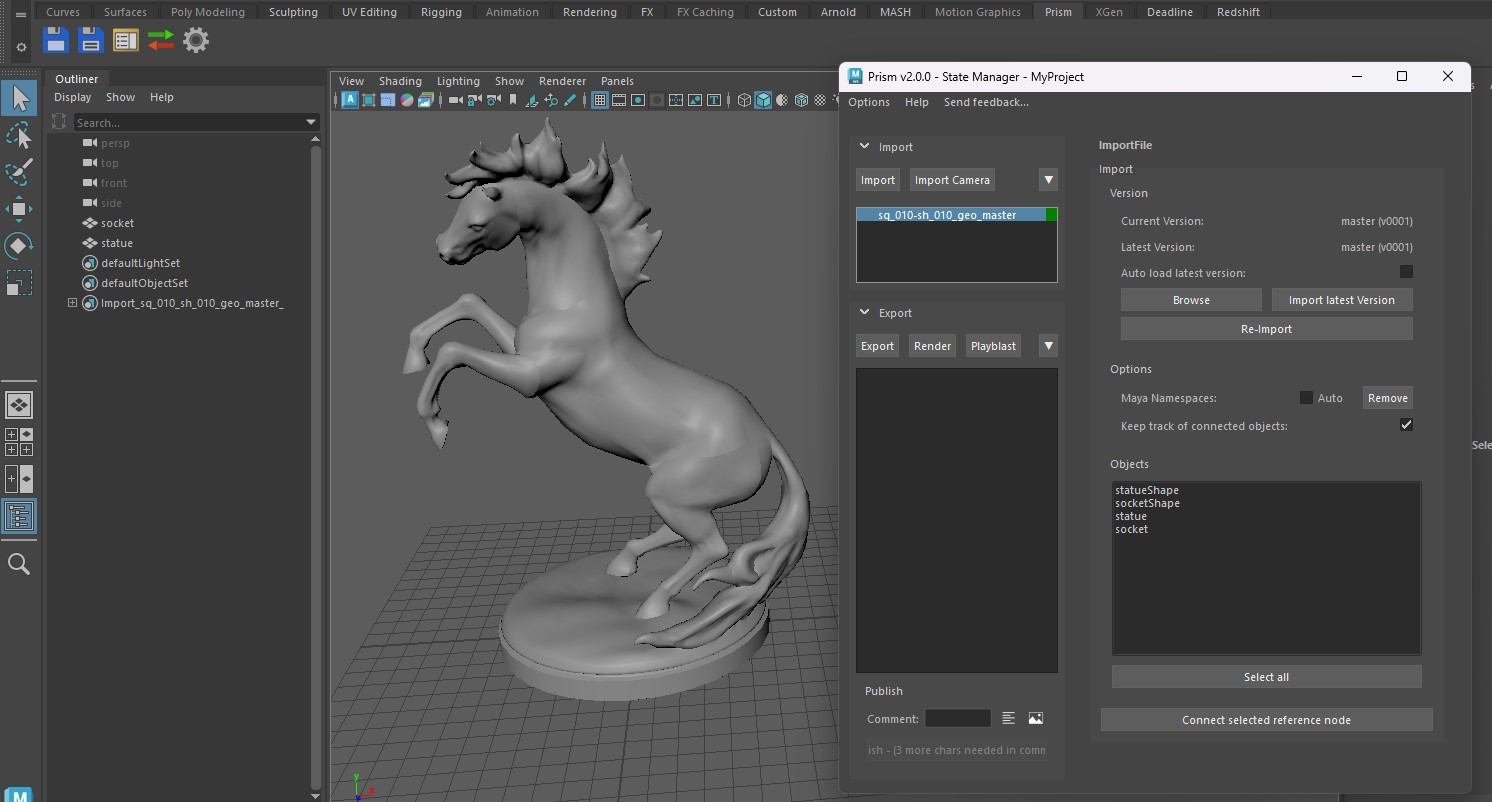
Importing objects#
Create a new department, task and scenefile under your shot in the Project Browser.
Creating a playblast#
You can animate your object now if you like.
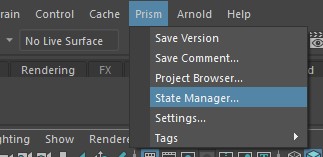
In the "Export" section of the State Manager, click the "Playblast" button to create a playblast state and change the identifier to "anim".
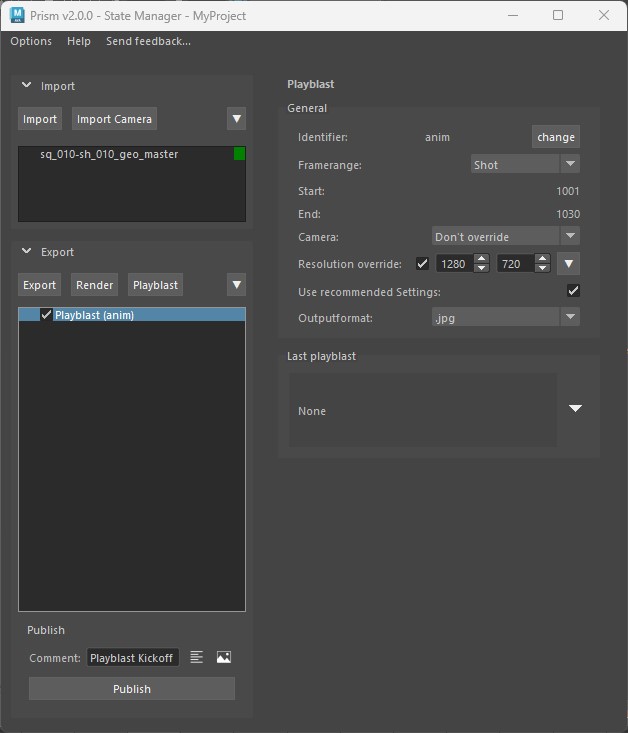
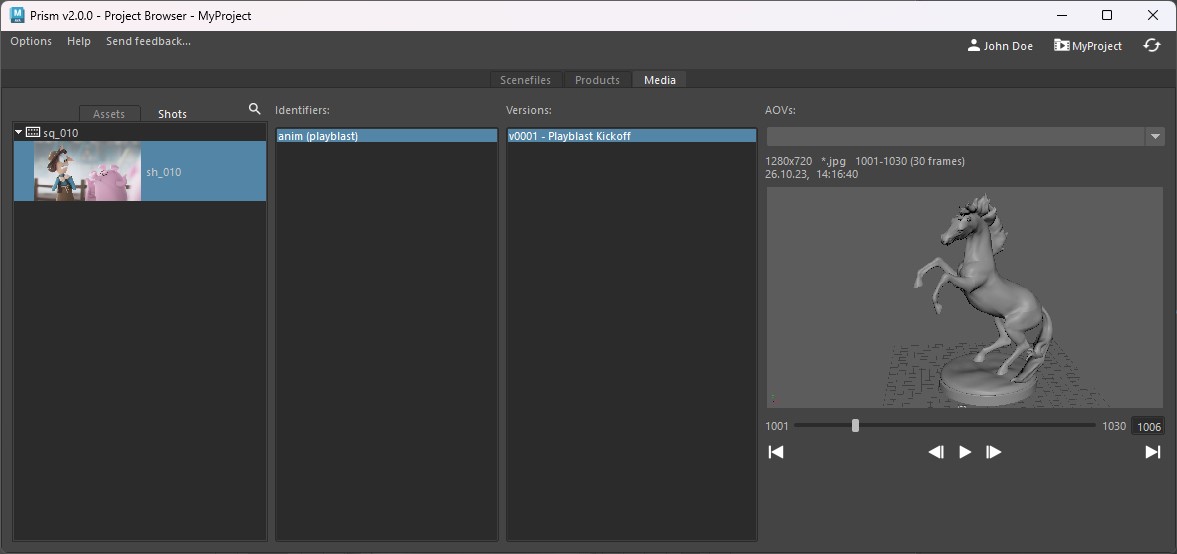
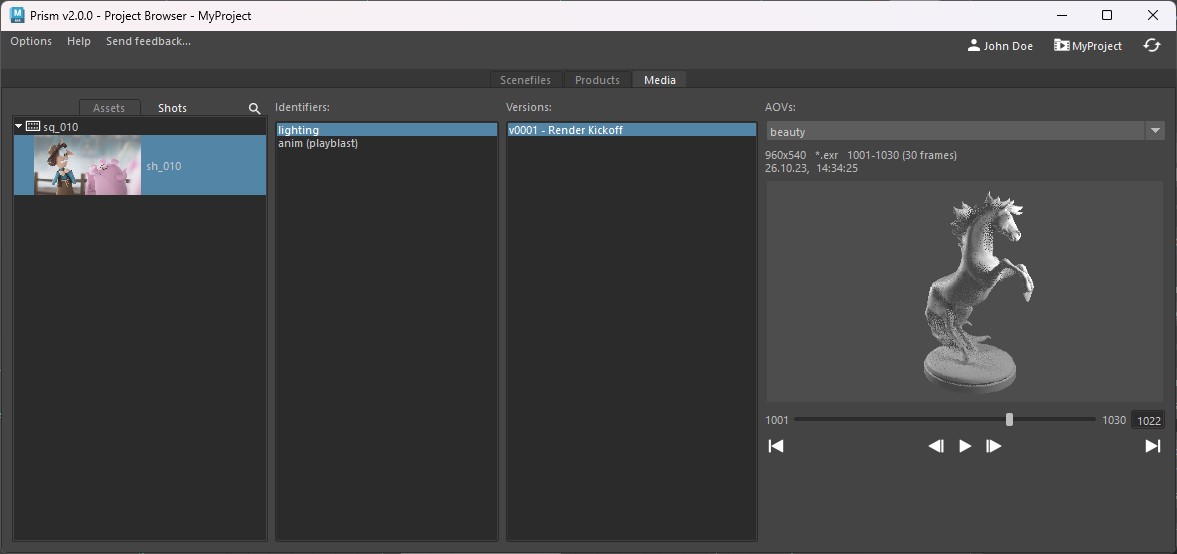
You can view the playblast in the "Media" tab in the Project Browser.
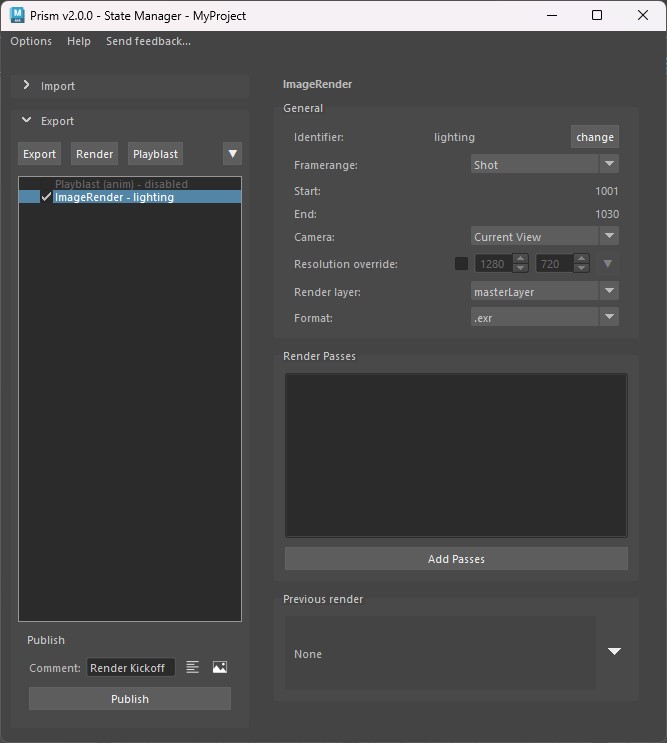
Creating a render#
Like the playblast you can also view the render in the "Media" tab in the Project Browser.
Submitting a render job to Deadline#
You can submit render job to your renderfarm if you have Amazon Deadline installed on your workstation.
Install the Deadline plugin from the Prism Hub and restart your DCC.
You will see an option in the ImageRender state to submit the render to Deadline.

Conclusion#
This concludes the overview of the basic workflow with Prism.
But you only scratched the surface of what's possible.
Check out the General and Plugins section for details about more features.