Using Prism with unsupported DCCs#
Prism provides plugins for many commonly used DCCs. However there are countless DCCs available on the market, which makes it impossible to create a plugin for every single DCC. If you have programming skills you can develop your own Prism plugins to support additional DCCs. Luckily it is possible for everyone without programming experience to integrate unsupported DCCs into their Prism workflow by using the standalone Prism Project Browser.
The following example shows how to work with a DCC, which doesn’t have an official Prism plugin. In this case Cinema4D will be used, but the same workflow can be also used for After Effects, Krita, Clarisse and many more.
Saving and versioning scenefiles#
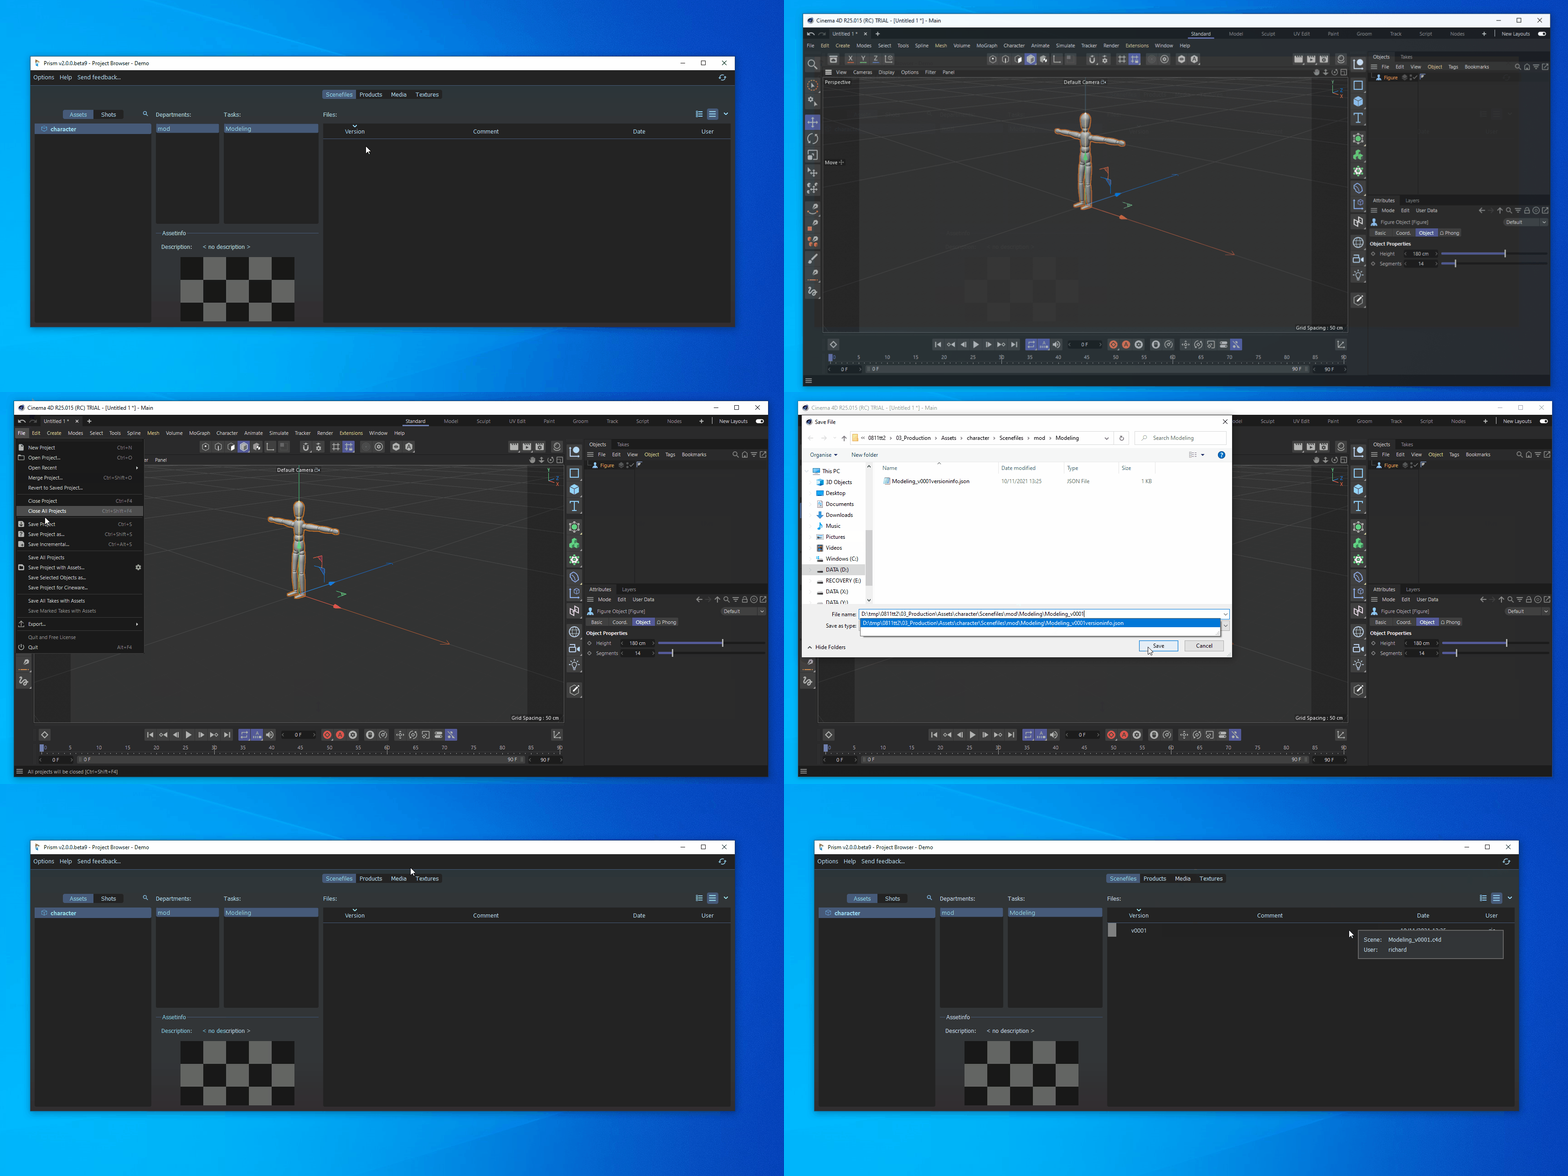
To save our Cinema 4D scenefile in Prism we open the standalone Prism Project Browser. In the “Scenefiles” tab we create an asset, a department and a task. In the empty scenefiles list we ricklick and select “Copy path for next version”.
In Cinema 4D we go to “File” -> “Save Project as…” and then we press CTRL + V to paste the path into the dialog. We can press enter and in the standalone Project Browser we can click on the refresh button in the top right corner to see our saved scenefile version.

Exporting geometry#
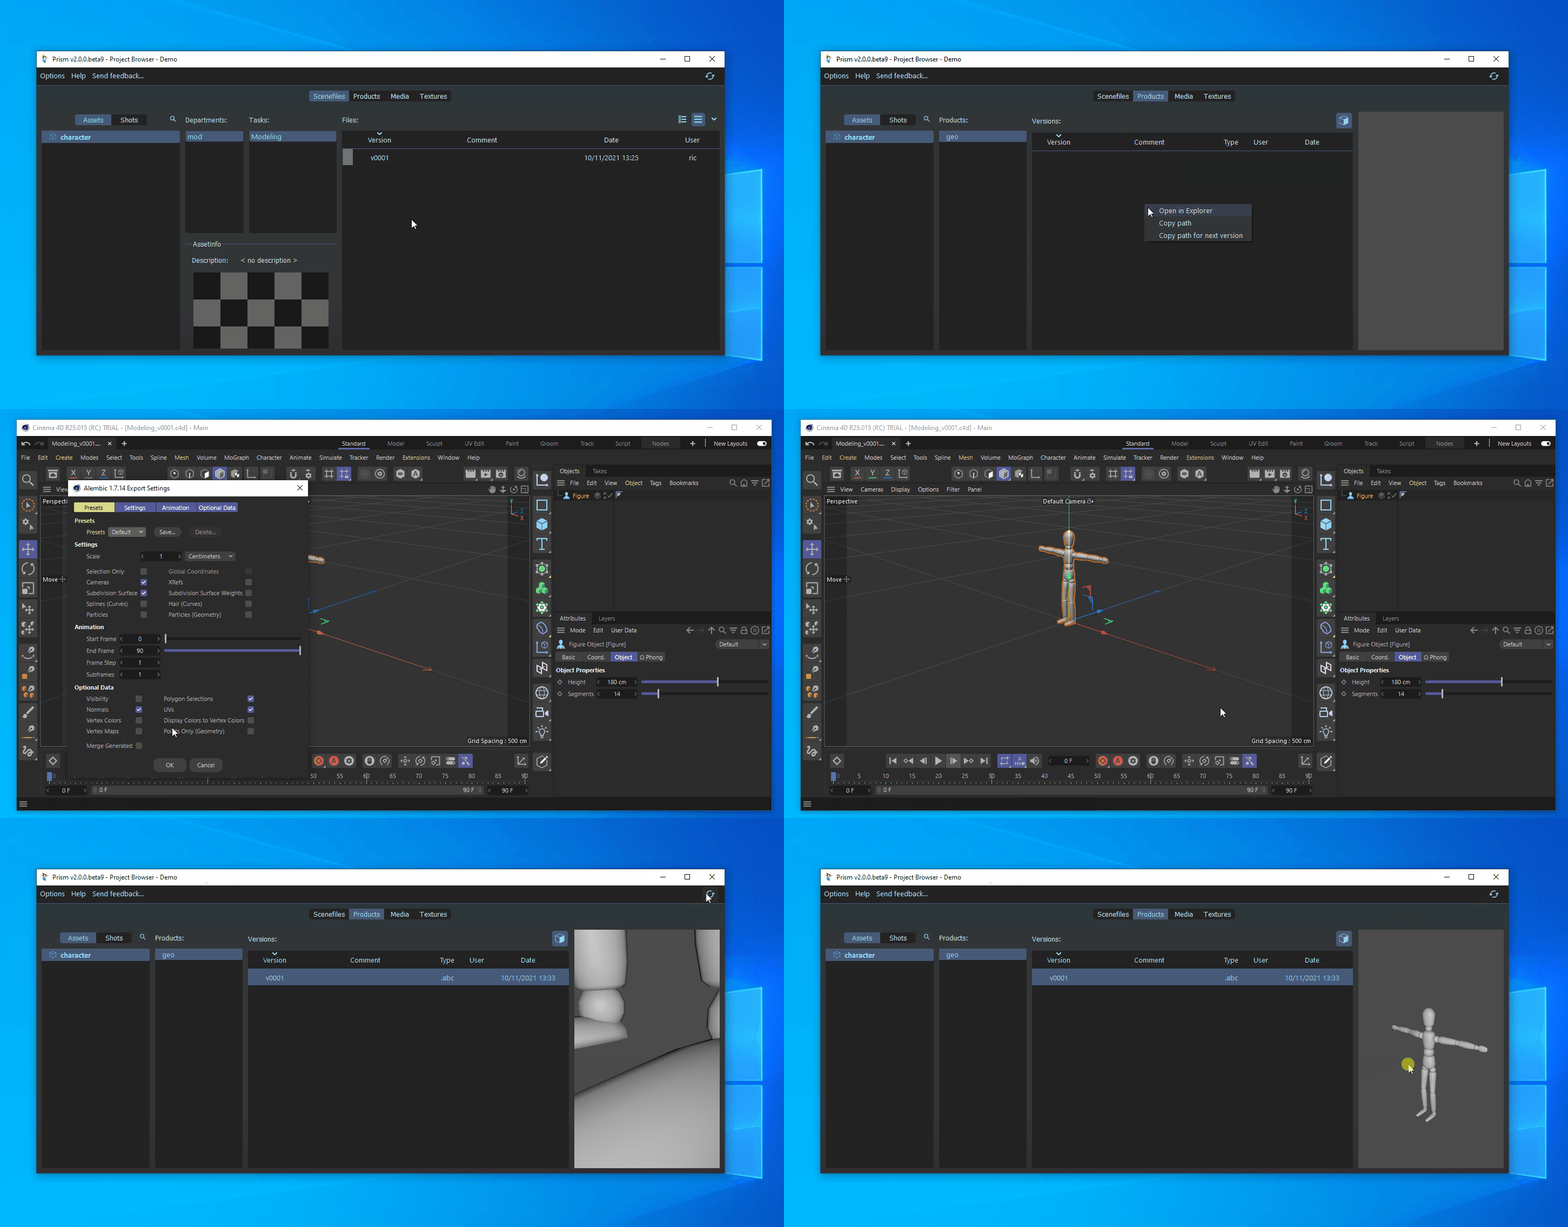
To export geometry from your current Cinema 4D scene into your Prism project open the standalone Prism Project Browser. In the “Products” tab select the asset under which you want to export your file. Rightclick in the “Products” list and select “Create Product…”. Name the product “geo” and press “Create”. In the “Versions” list rightclick and select “Copy path for next version”. The path will be copied to your clipboard.
In Cinema 4D select “File” -> “Export…” -> “Alembic (.abc)”. Adjust the export settings to your liking and press “OK”. A file browser dialog opens up. Press CTRL + V and enter to export the geometry into your Prism project. In the standalone Project Browser you can hit “F5” to refresh the lists and see your exported version.

Importing geometry#
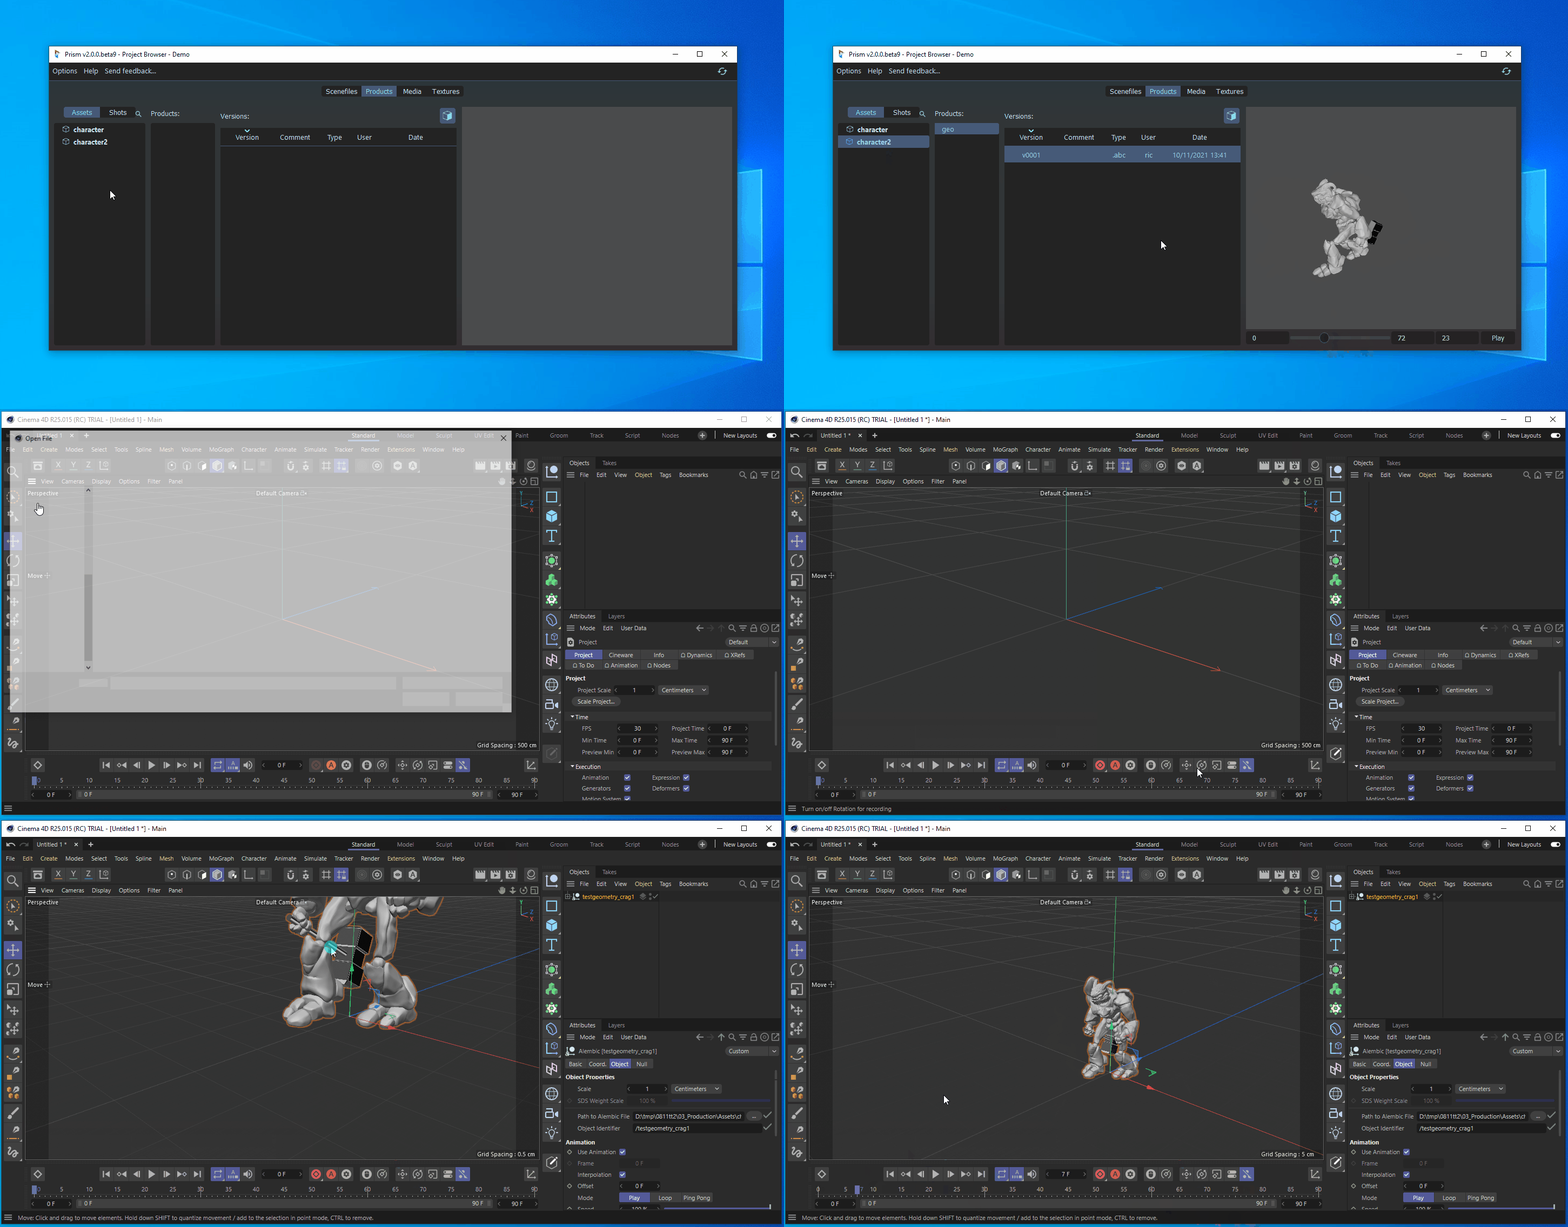
To import geometry from your Prism project into Cinema 4D open the standalone Prism Project Browser. In the “Products” tab select a product version, which you want to import. Rightclick this version and select “Copy path”. This will copy the filepath to your clipboard.
In Cinema 4D select “File” -> “Merge Project…”, press CTRL + V and enter to import the geometry into your current scene.

Saving rendered images#
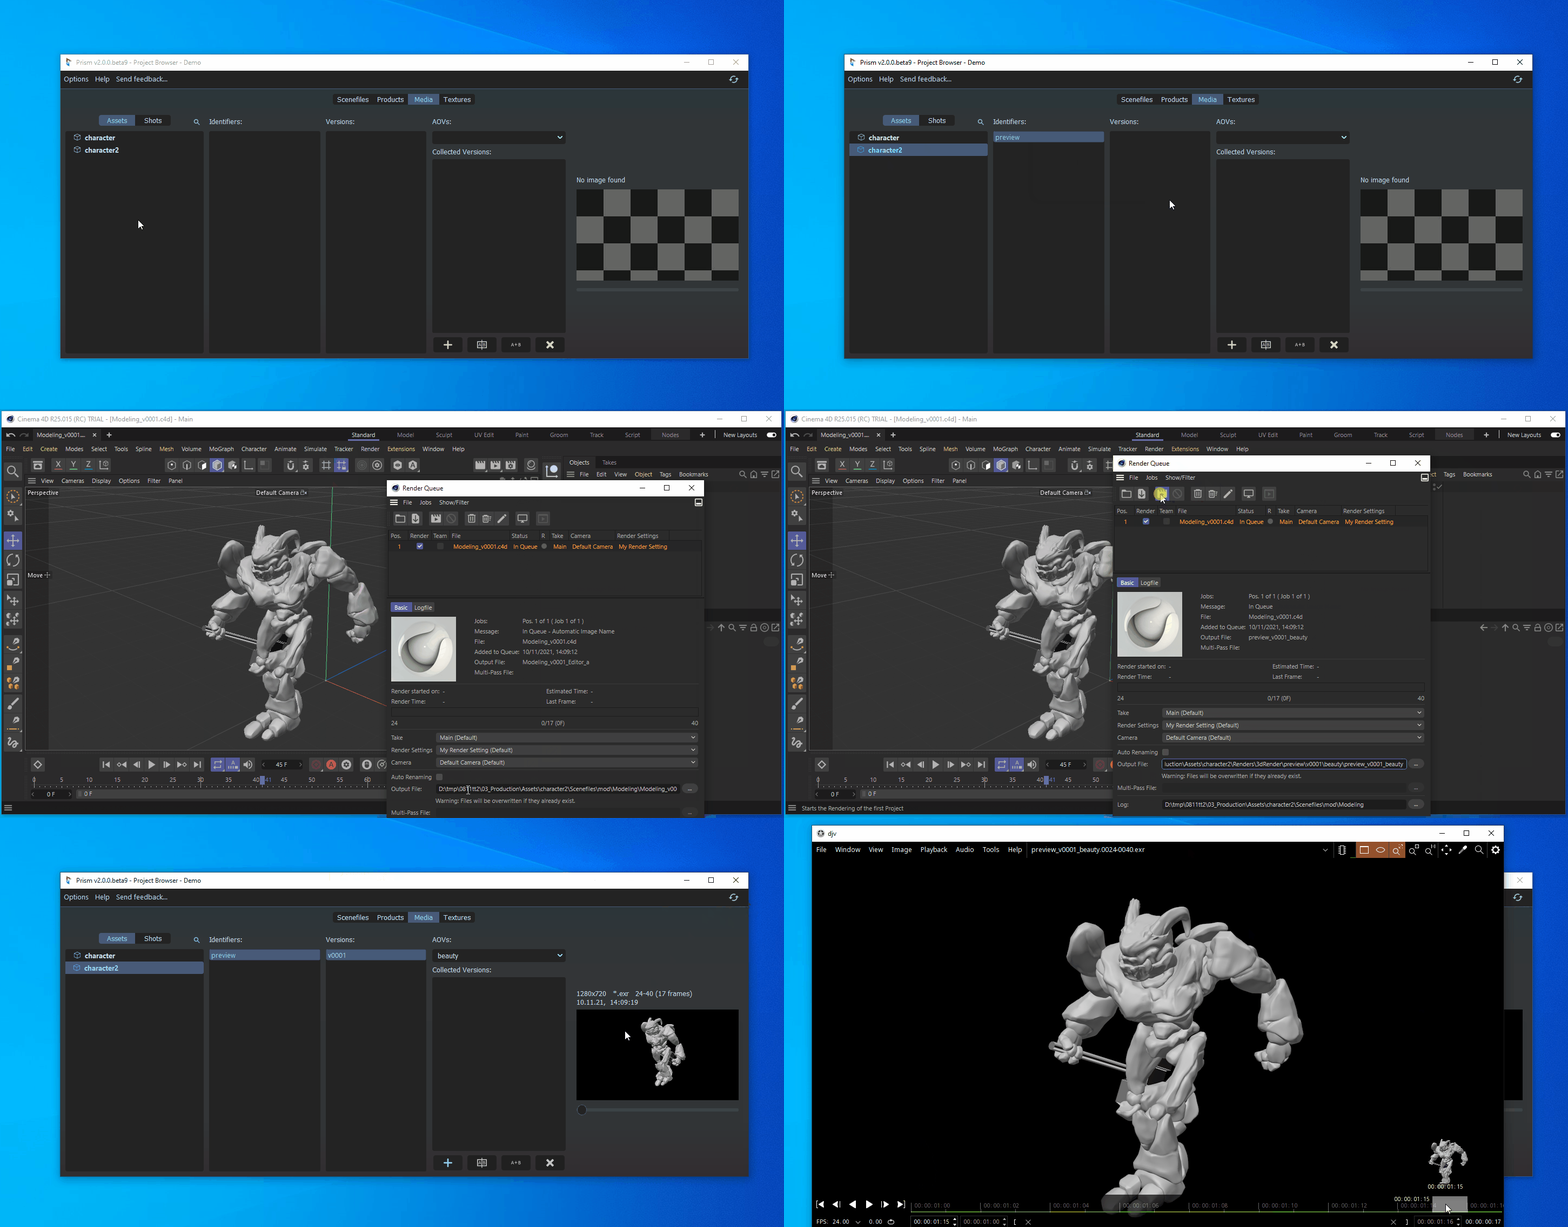
Rendering images from Cinema 4D to your Prism project works similar as the previous steps. Open the standalone Prism Project Browser and in the “Media” tab select an asset. Rightclick in the “Identifier” list, select “Create Identifier”, enter “preview” as the identifier name and press “Create”. Rightclick in the versions list and select “Copy path for next version”.
In Cinema 4D select “Render” -> “Add to Render Queue…” and paste the path from your clipboard to the “Output File” setting. Now you can start your render and afterwards refresh the standalone Prism Project Browser to see your rendered images.

Bonus: Adding icons to scenefile types in the Project Browser#
This step is not required, but many artists like to see the DCCs icon in front of every scenefile version. Without this step the scenefile type will be indicated by a grey color, which means that the scenefile type is unknown.
First we will create a new Prism plugin. For that we open the Prism User Settings (for example from the Prism Tray icon). In the “Plugins” tab we click on the “+” icon in the top right corner. We set the plugin name to “Cinema4D” and set the type to “App”. When we press “OK” the plugin will be created and the plugin location will open in the Windows Explorer. From this folder we can open the file “Prism_Cinema4D_Variables.py” in a text editor. In the text editor we change this line:
self.sceneFormats = [".format"]
to this line:
self.sceneFormats = [".c4d"]
Also we are adding two more lines at the end of the file:
self.pluginDirectory = os.path.abspath(os.path.dirname(os.path.dirname(__file__)))
self.appIcon = os.path.join(self.pluginDirectory, "Resources", "cinema4D.ico")
Watch out to keep the indentation of this line the same as all the other lines.
Lastly we add this line at the top of the file without indentations:
import os

Now we can save and close the file.
In the plugin directory (one folder above the “Scripts” folder) we create a folder named “Resources” and we place our Cinema4D icon file in there. The path should look like this:
%userprofile%DocumentsPrism2pluginsCinema4DResourcescinema4D.ico
We can get that icon file from google or we can extract that icon from the Cinema 4D.exe using this tool: Resource Hacker
Now we can restart Prism and our .c4d scenefiles will be displayed with the Cinema 4D logo in the project browser.
