Resolve#
The Resolve plugin integrates Prism into the editorial and color grading software Blackmagic Design DaVinci Resolve.
Overview#
The main functionality of this plugin is to create shots in Prism from the timeline in Resolve, import the latest shot renders into the Resolve timeline and render out the Resolve timeline to the Prism project.
There is a free and a paid (studio) version of Resolve available on the Blackmagic website. The free version has some feature limitations compared to the studio version. In Resolve versions newer than 18.0 the scripting features (which are required to use the Prism Resolve plugin) are only available in the studio version.
Setup#
The Prism Resolve integration can be installed to the Resolve preferences folder, which is usually at this path:
C:\ProgramData\Blackmagic Design\DaVinci Resolve
Although not recommended it can also be installed to the Resolve installation directory, which is usually at this path:
C:\Program Files\Blackmagic Design\DaVinci Resolve
In order to use the plugin it is required to have Python 3,9, 3.10, 3.11 or 3.13 installed on the computer and added to the PATH environment variable (this can be done using a checkbox in the Python installer). The installer can be downloaded from here.
To check if Resolve can find the Python installation you can open the console from "Workspace" -> "Console" and click the "Py3" button at the top. If you can enter print("test") and execute it without error, Python is installed correctly.
Accessing Prism inside of Resolve#
Before accessing Prism in Resolve a Resolve project has to be created and opened using the default Resolve Project Manager window, which opens when you launch Resolve. When Python is installed and the Prism integration was added to Resolve, Prism can be launched from the main menu bar in Resolve: "Workspace" -> "Scripts" -> "Comp" -> "Prism" A Prism popup will show up and some text will be copied to your clipboard automatically. Next you have to open the scripting console under "Workspace" -> "Console". Here you have to click the "Py3" button at the top of the window and then click in the text field at the bottom of the window. Here you can press ctrl + v to paste the text from your clipboard and press enter. The currently open Prism popup will close now and the Prism Tools window will open, which gives you access to all available Prism tools inside Resolve.
In case of any problem please check the Resolve console under "Workspace" -> "Console".
Features#
Saving a Resolve project in Prism#
Resolve projects are saved in a database, which you choose in the Rsolve Project Manager window. Because of that Prism cannot save and version the Resolve projects like scenes of other DCCs. However you can save a reference to your database project in the Prism folder structure. You can view these references in the Prism Project Browser and open Resolve projects by double clicking them. The references saved in the Prism project are basically just text files containing the name of the Resolve project. If you are doubleclicking a reference in the Project Browser, but no Resolve project with the matching name exists in your Resolve database, then Prism is unable to open the project. This is important to understand when working in a team where multiple people have to access the same Resolve project. In this case you can create a new database in your Prism project and save the Resolve project in there. As long as every teammember is using the same database you can open each others Resolve references using the Prism Project Browser.
To save a reference to your Resolve project in Prism, open the "Project Browser" from the Prism Tools window. Select or create an asset/shot, a department and a task and then rightclick in the scenefiles list and select "Create new version from current". A new version will show up in the list. The comment of this version shows the project name, which Prism will look for in your database when you doubleclick the version.
Note: Even though you can create multiple references with different versions this way, all references will link to the same project in your database. You cannot use Prism to create multiple versions of the same Resolve project. Use the backup features in Resolve for that.
Creating shots from the timeline#
You can create shots in your Prism project based on the clips in your Resolve timeline. Use the "Create Shots..." button in the Prism Tools window to open the "Create Shots" window. In this window you can see a shottree with sequences and shots to be created. When this window open it will load shots from your Resolve timeline. Each videotrack in your timeline will result in a sequence in the shottree with the trackname used as the sequence name. The shotnames are numbered with steps of 10. By default startframe is set to 1001 and the endframe will be calculated from the duration of the clip in your timeline. On the rightside of the window there are options to set a different startframe. You can also uncheck the "Set startframe" checkbox. In this case the startframe of the clip in the Resolve timeline will be used. Each shot has a preview image taken from the source media of the clip. If there are many clips in the timeline it can take a few seconds to load the previews for all shots. You can press ctrl when opening the "Create Shots" window to disable the "Show previews" option. Using the rightclick menu you can add and delete sequences and shots in the shottree. It's also possible to rename sequences and shot, set different frameranges and add a description by doubleclicking items in the shottree. Making changes to the shottree doesn't modify or create anything inside of Resolve or your Prism project. It's just a preview of what's going to be created when you click the "Create" button.
The "Render shots" checkbox lets you render out each shot from the Resolve timeline into the correct location inside the Prism project so it can be viewed by other departments outside of Resolve.
The "Show existing shots" button opens a window where you can see all the currently existing shots in your project. This can help to make sure the same shot and sequence naming convention is used across the whole project.
To revert any changes you can use the "Reload from Resolve" button on the right side of the window.
Pressing the "Create" button will create all the shots in the Prism project, which are currently in the shottree. The framerange, preview and description will be set for each shot. If the "Render shots" checkbox is set and an identifier is specified each shot will be rendered in Resolve now.
In the rightclick menu there is an option named "Copy to clipboard", which lets you copy/paste the whole shottree data in an external spreadsheet like Excel or Google Docs. There you can modify the data, copy it back to the clipboard and use the "Paste from clipboard" option in the rightclick menu of the shottree to update the shottree with your modified data.
Importing media from shots into the timeline#
You can drag & drop media from the Project Browser preview to the Resolve timeline.
To import media from multiple shots at once you can use the "Import Media..." button in the Prism Tools window. In the new window click the "Choose..." button to select all shots from which you want to import media. Next you have to specify an identifier of the media, which you want to import. An error on the right side will show you any available identifiers in the shots you have selected.
There are two modes of import available. The default is "Append to current track". This will create the new clips after the last clip on the current videotrack. If the videotrack is empty the new clips will be added at the start of the timeline. To set which videotrack is the current one you can use the "V#" button on the left side of each videotrack name in the Resolve timeline.
The second mode is "Add takes to matching clips". In this mode you have to select a videotrack from the dropdown. On import Prism will check for each shot if there is an existing clip in the videotrack, which has the same startframe as the shot. The "editIn" metadata of each shot is used to find the matching clip in the timeline. If there was a matching clip found the new media will be imported as a "take" to the existing clip. Use the "Take Selector" in Resolve to switch between different takes of a clip.
You can use the "Preview" button to see which media was found for the selected shots. Use the "Import" button to create the clips in the Resolve timeline.
Render out the timeline#
Use the "Render..." button in the Prism Tools window to open the "Render Setup" window, which allows you to render your current timeline to the Prism project. In this window you have to select an asset or a shot and an identifier under which you want to save your output. The comment field is optional. You can use the "Set outputpath" button to let Prism set the outputpath and filename in your render settings and switch to the "Deliver" page in Resolve. The "Render" button sets the outputpath too, but additionally it also adds a new job to the Render Queue and renders the job.
Troubleshooting#
No module named 'Prism_Resolve_Server'#
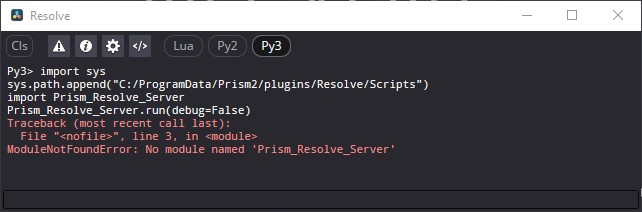
import os, sys
print("Version: " + sys.version)
print("Path: " + os.path.dirname(sys.path[1]))
If you installed a supported Python version, but Resolve can't find it, then you can set the PYTHONHOME environment variable on your system to tell Resolve, where your Python is installed.
Environment Variables#
The Resolve plugin can be controlled using the following environment variables:
Name |
Description |
|---|---|
PRISM_RESOLVE_DEPARTMENT |
The department to use in the render outputpath when "Link Products and Media to tasks" in enabled in the project settings (e.g. editorial, default: Conform) |
PRISM_RESOLVE_TASK |
The task to use in the render outputpath when "Link Products and Media to tasks" in enabled in the project settings (e.g. animatic, default: Resolve) |