The ZBrush plugin integrates Prism into Maxon ZBrush.
Overview
The main functionality of this plugin is to save and version up ZBrush scenes, to import and export geometry from ZBrush into the Prism project and to export diffuse maps and bake displacement maps.
Setup
Download and install the Prism ZBrush plugin in the Prism installer or from the Prism Hub.
You can add the Prism integration to ZBrush by selecting the ZBrush location in the installer or by adding a new integration in the "DCC apps" tab of the Prism User Settings.
The Prism ZBrush integration has to be installed to the ZBrush preferences folder in ZBrush 2026.1 and newer:
%APPDATA%\Maxon\ZBrush_[HashValue]
For ZBrush versions before 2026.1 the Prism integration need to be installed into the ZBrush installation directory:
C:\Program Files\Maxon ZBrush 2025
In order for the Prism ZBrush plugin to work correctly it is required that ZBrush was launched at least once before the Prism ZBrush integration was added.
The plugin is available on Windows only.
Accessing Prism inside of ZBrush
In ZBrush Prism can be accessed from the "Zplugin" menu in the main menu bar in ZBrush under the "Prism" section. The Prism section contains buttons to access different features of Prism.
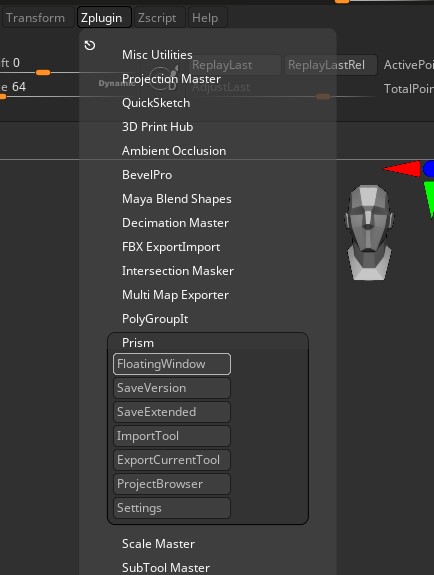
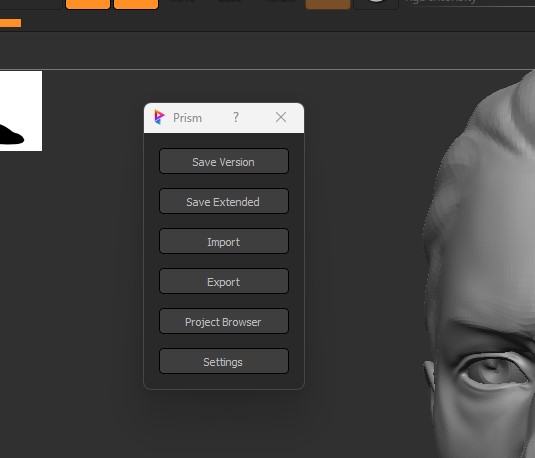
The first button "FloatingWindow" will open a floating window, which has the same buttons as you can find in the menu section.
The advantage of the floating window is that it can open different Prism tools much faster than the menu buttons.
The menu buttons will launch a new process everytime you click on them, while the floating window keeps the process running and therefore generates less overhead.
The floating window also stays on top of the ZBrush window and provides access to Prism tools with less clicks than the Prism menu section.
Features
The following features are available in the Prism section in the Zplugin menu as well as in the floating window.
Saving and loading a ZBrush project in Prism
To save a ZBrush project for the first time in Prism, click on the "Project Browser" button, select a task inside an asset/shot and rightclick in the scenefiles list.
Here you can choose "Create new version from current". This will save your currently active ZBrush project in the selected context as the next available version.
To save a new version of your ZBrush project you can use the "Save Version" button.
This will increment the version of your current ZBrush project by 1 and save it as a new file.
You can also use the "Save Extended" button to open the "Save Extended" dialog, where you can specify a comment, a multi-line description and capture a preview image using a screengrab.
This additional information will be saved together with an incremented version of the ZBrush project file.
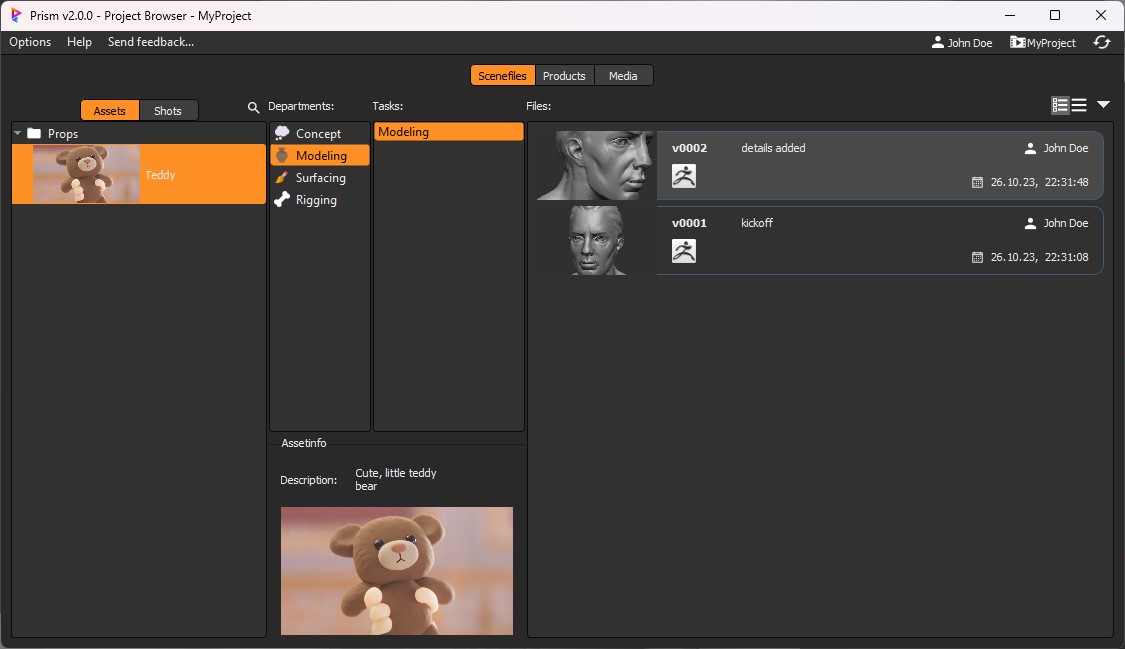
To open an existing ZBrush project, for example if you want to go back to a previous version, you can open the Project Browser and double click the scenefile version, which you want to open.
Importing geometry
To import geometry into ZBrush you can use the "Import Tool" button.
This will open the "Product Browser" window where you can select a product, which you want to import.
You can also import files, which were not saved using Prism by using the "Import custom files" button in the Product Browser.
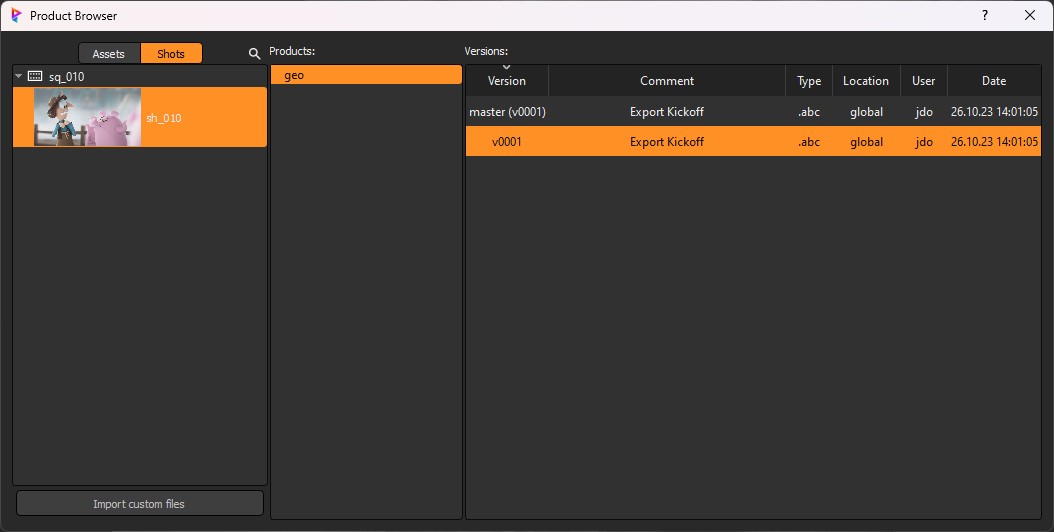
Supported formats for import are .abc, .obj and .fbx.
NOTE: .abc is only supported in ZBrush 2021 and later.
Exporting geometry
The "Export Current Tool" button opens a window, which allows you to export the active tool of your currently open ZBrush project.
Supported file formats are .abc, .obj and .fbx.

It's required to specify a productname to be able to find the product later in the Product Browser.
A comment can be set optionally.
By default the exported file will be saved under a new version.
By unchecking the "Version Up" checkbox you can select an existing version, which you like to overwrite.
If multiple export locations are available in your Prism project then you will also see a "Location" dropdown to specify in which location the file will be saved.
If you export an .abc file and the USD Prism plugin is loaded you will see some additional options.
The "Add to asset USD container" checkbox specifies if the exported alembic file will be added to the department layer of the current entity USD container.
The department layer is defined automatically by the context of your current ZBrush project.
E.g. if your ZBrush project was saved in the modeling department of an asset then the departmentlayer will be the modeling layer.
If you are planning to use multiple products inside the same department layer you can also specify a sublayer.
Your exported file will be saved as a sublayer then, which will be referenced in the department layer, which will be referenced in the entity USD container.
Exporting maps
In the export window you can enable the map export, which will export a diffuse map for all visible subtools.
After the export the diffuse maps of all subtools will be merged into a single texture file.
If the subtools have multiple subdivisions then also a displacement map gets exported for each visible subtool, which then get merged into a combined displacement map.
Accessing the Project Browser
The "Project Browser" button will open the Prism Project Browser window.
Accessing the Prism Settings
The "Settings" button will open the Prism Settings window.