Project Browser#
The Project Browser is the central tool in Prism for accessing files and data of your projects.
It is organized into different tab, which are explained in more detail below.
In the main menu bar there are a couple of options and help information. On the right side of the menu bar you can edit your username (unless it’s read-only because of your project or studio settings) and you can switch to a different active project.
Scenefiles#

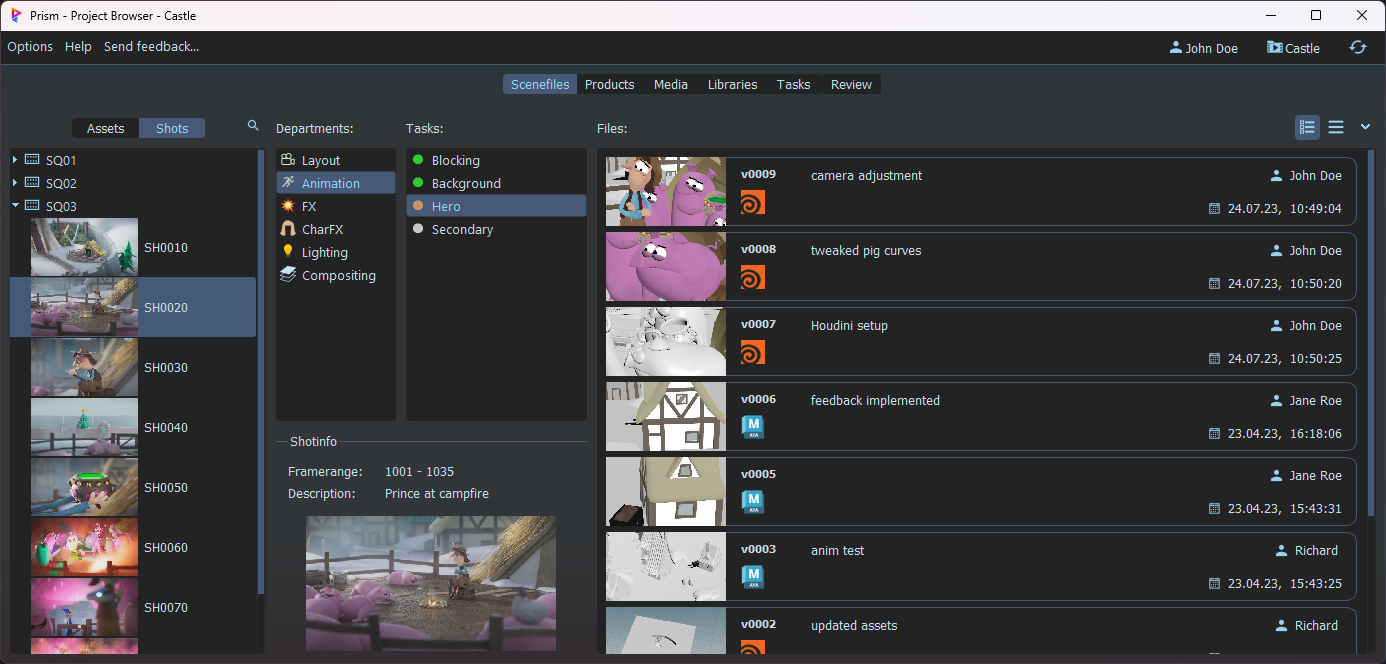
On the left side select an asset/shot, then a department and task and then you can view the existing scenefile versions for that task on the right side.
You can also create assets, shots, departments and tasks by double-clicking the lists or from the context menu. When a task is selected you can save a new scenefile version from the context menu or open an existing version by double clicking it.
External scenefiles can be ingested by drag&drop into the files table when a task is selected.
Department Icons#
Department icons are supported since v2.0.0.beta17.5 and default icons are included in Prism since v2.0.0.beta17.14.
Prism will look for icons in your project folder under 00_Pipeline\\Icons. The filename of the icons should be the department name plus .png. For example Animation.png.
If you customized your department names or want to change the default icons, you can add/update the icons in the folder and restart Prism.
C:\\Program Files\\Prism2\\Presets\\Projects\\Default\\00_Pipeline\\Icons.00_Pipeline\\Icons folder in your project.Products#
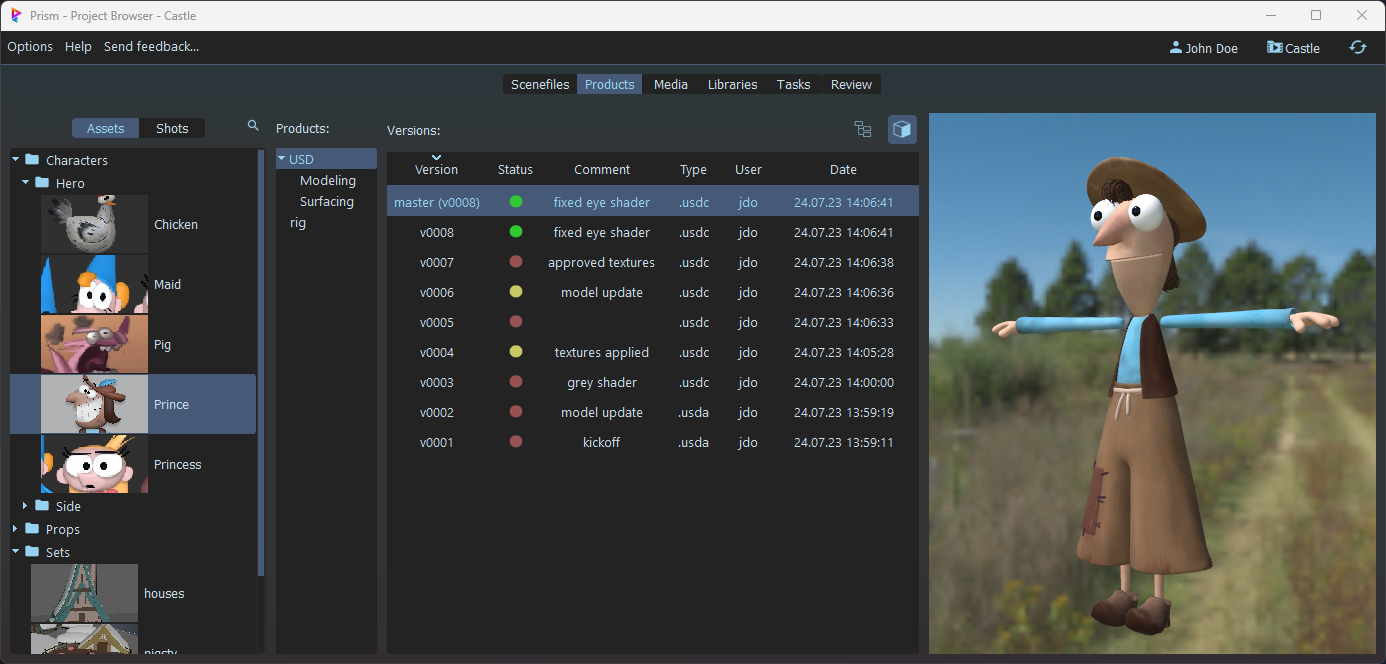
The Products tab let’s you view all the product versions of your assets and shots. Products are usually geometry caches like .fbx or .abc files, volume caches like .vdb files or other filetypes like .usd. Basically everything that gets exported from a scenefiles, which isn’t considered a media file, is considered a product.

External files can be ingested as a product by drag&drop into the versions table when a product is selected.
Many file formats can be displayed in a 3d viewport when the USD plugin is loaded.
Media#
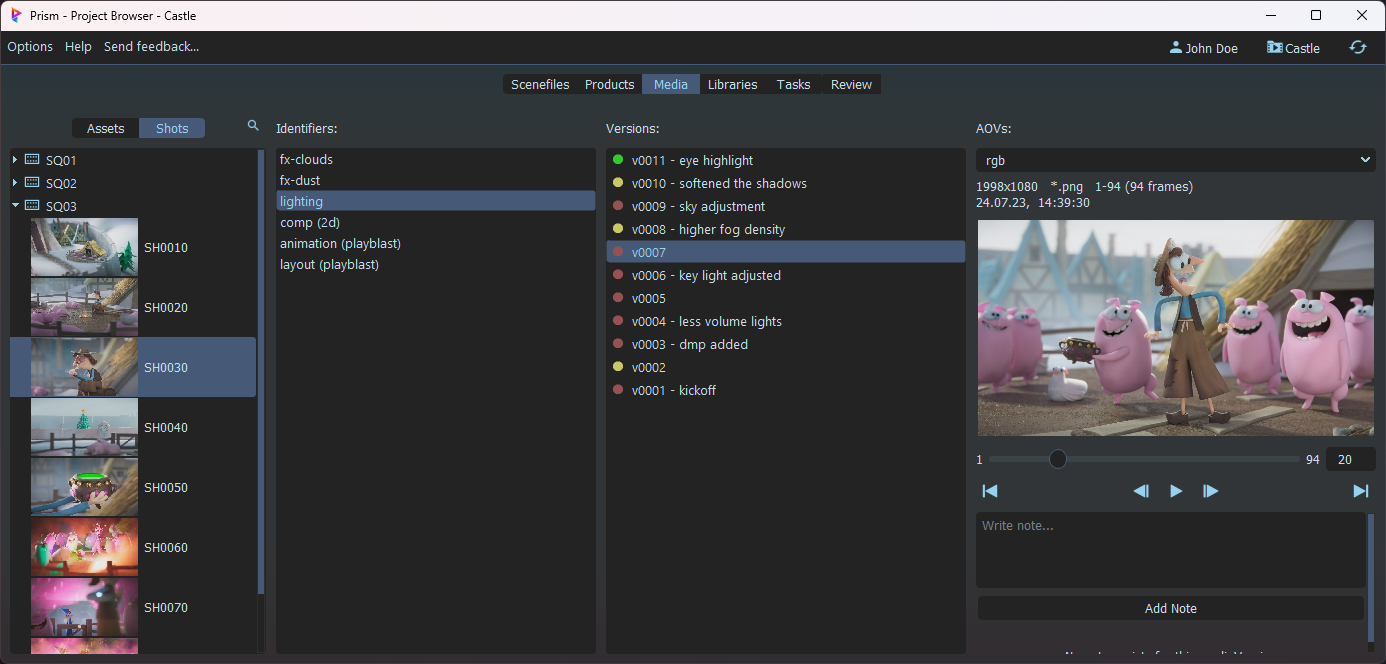
The Media tab gives you access to all media versions of your assets and shots. Usually these files are renders or playblasts.

Additional Tabs#
The three tabs mentioned above are visible by default. Additional tabs might be visible depending on the plugins you have installed.
For example the Libraries plugin adds a “Libraries” tab for accessing textures, models, references and other files.
The Project Management plugin adds a “Review” tab for media playlists and a “Tasks” tab for viewing assigned tasks.
See the documentation of these plugins for more information.
More tabs can be added by custom plugins.
Creating Assets#
Creating Shots#
Entity Meta Data#
Name |
Meaning |
|---|---|
fps |
This will override the fps value in the Project Settings. When opening a scenefile in this entity, Prism will warn the user if the fps in the scenefile doesn’t match this value. (e.g. 25) |
resolution_x |
This will override the x resolution in the Project Settings. When opening a scenefile in this entity, Prism will warn the user if the x resolution in the scenefile doesn’t match this value. (e.g. 1920) |
resolution_y |
This will override the y resolution in the Project Settings. When opening a scenefile in this entity, Prism will warn the user if the y resolution in the scenefile doesn’t match this value. (e.g. 1080) |
handles_in |
This will set the handles at the beginning of the shot. When opening a scenefile in this entity, Prism will warn the user if the startframe in the scenefile doesn’t match the startframe of the shot - this value. (e.g. 6) |
handles_out |
This will set the handles at the end of the shot. When opening a scenefile in this entity, Prism will warn the user if the endframe in the scenefile doesn’t match the endframe of the shot + this value. (e.g. 6) |
handles |
This will set the handles at the beginning and at the end of the shot if handles_in or handles_out don’t exist in the meta data of this entity. (e.g. 6) |
